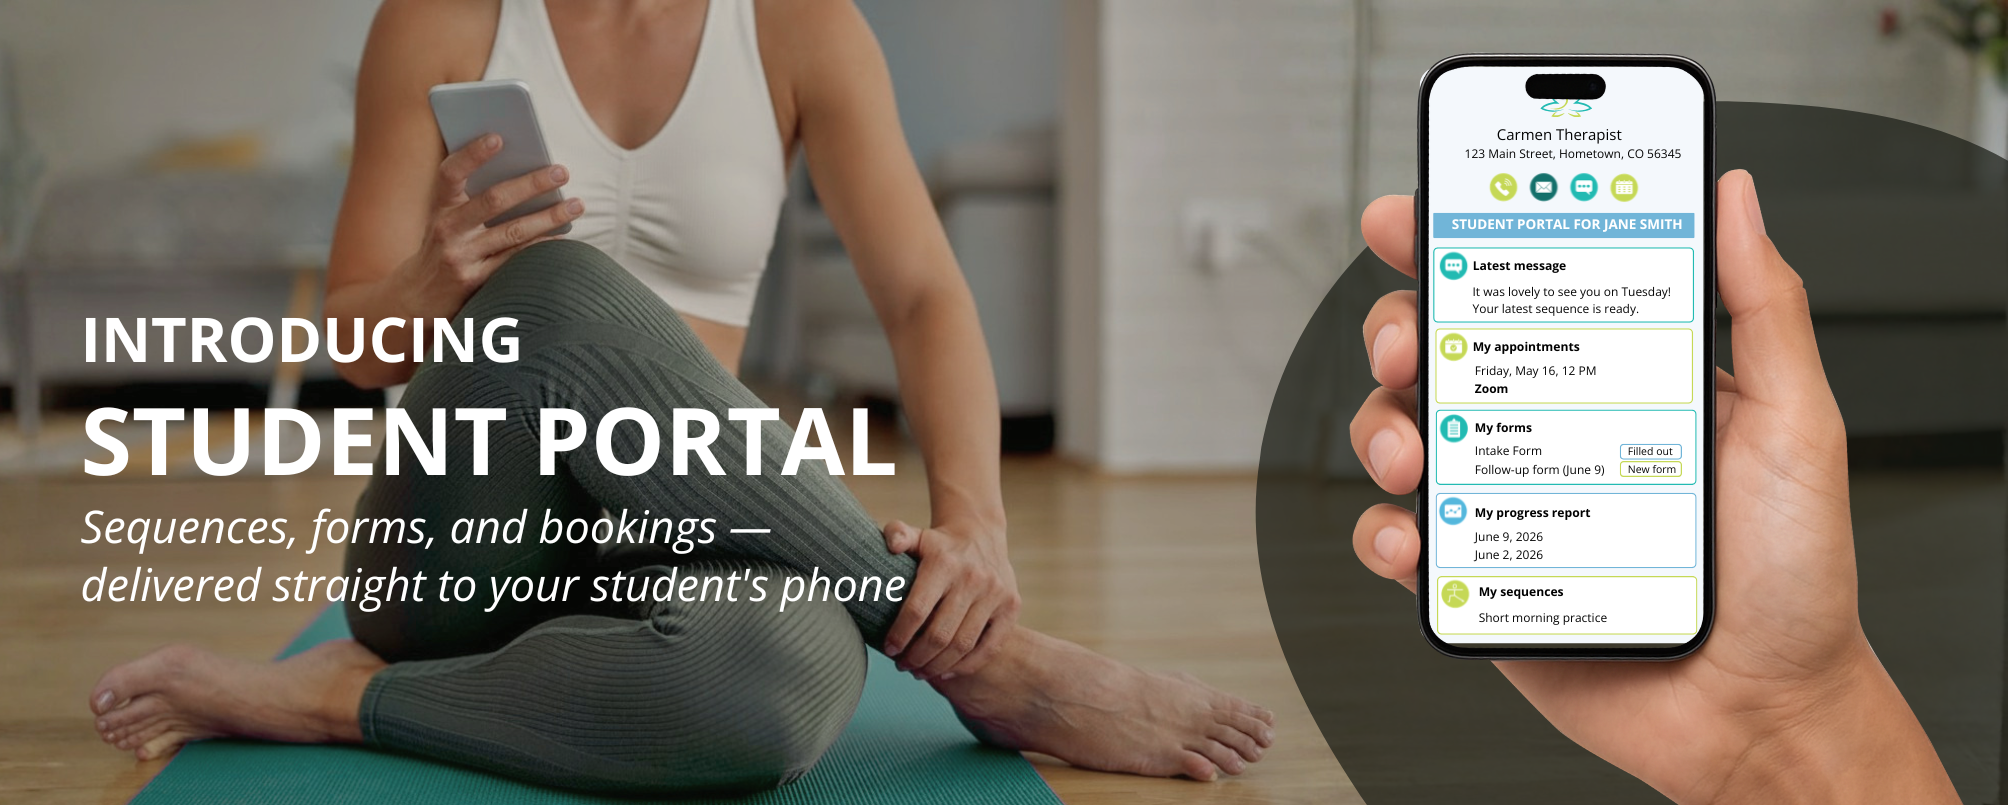
Keeping track of everything you send each student — sequences, forms, booking links, files — can get complicated fast. And for your students, finding it all again in their crowded inbox is even harder. The Student Portal solves that. Every time you send something to a student it automatically appears in their personal portal. One place, always organized, always on their phone.
For your student, it means everything they need from you is one tap away. No inbox searching, no lost attachments. Just a clear, simple space that feels personal and professional.
What’s included in the portal
● Communication: Your student can communicate with you anytime by calling, emailing, or messaging
● Scheduling: Your student can see their appointments with you and they can book, cancel and modify appointments
● Forms: Your student has access to their new and filled out forms, all mobile-friendly. They can start filling the form out now and finish it later.
● Progress tracking: Your student can view the summary of their latest session with you and the recommendations your gave them
● Files and links: Your student can have easy access to any files or links you sent them
● Practice sequences: Your student has access to all sequences you chose to share with them.
Getting started is simple:
How to do specific tasks in the Student Portal:
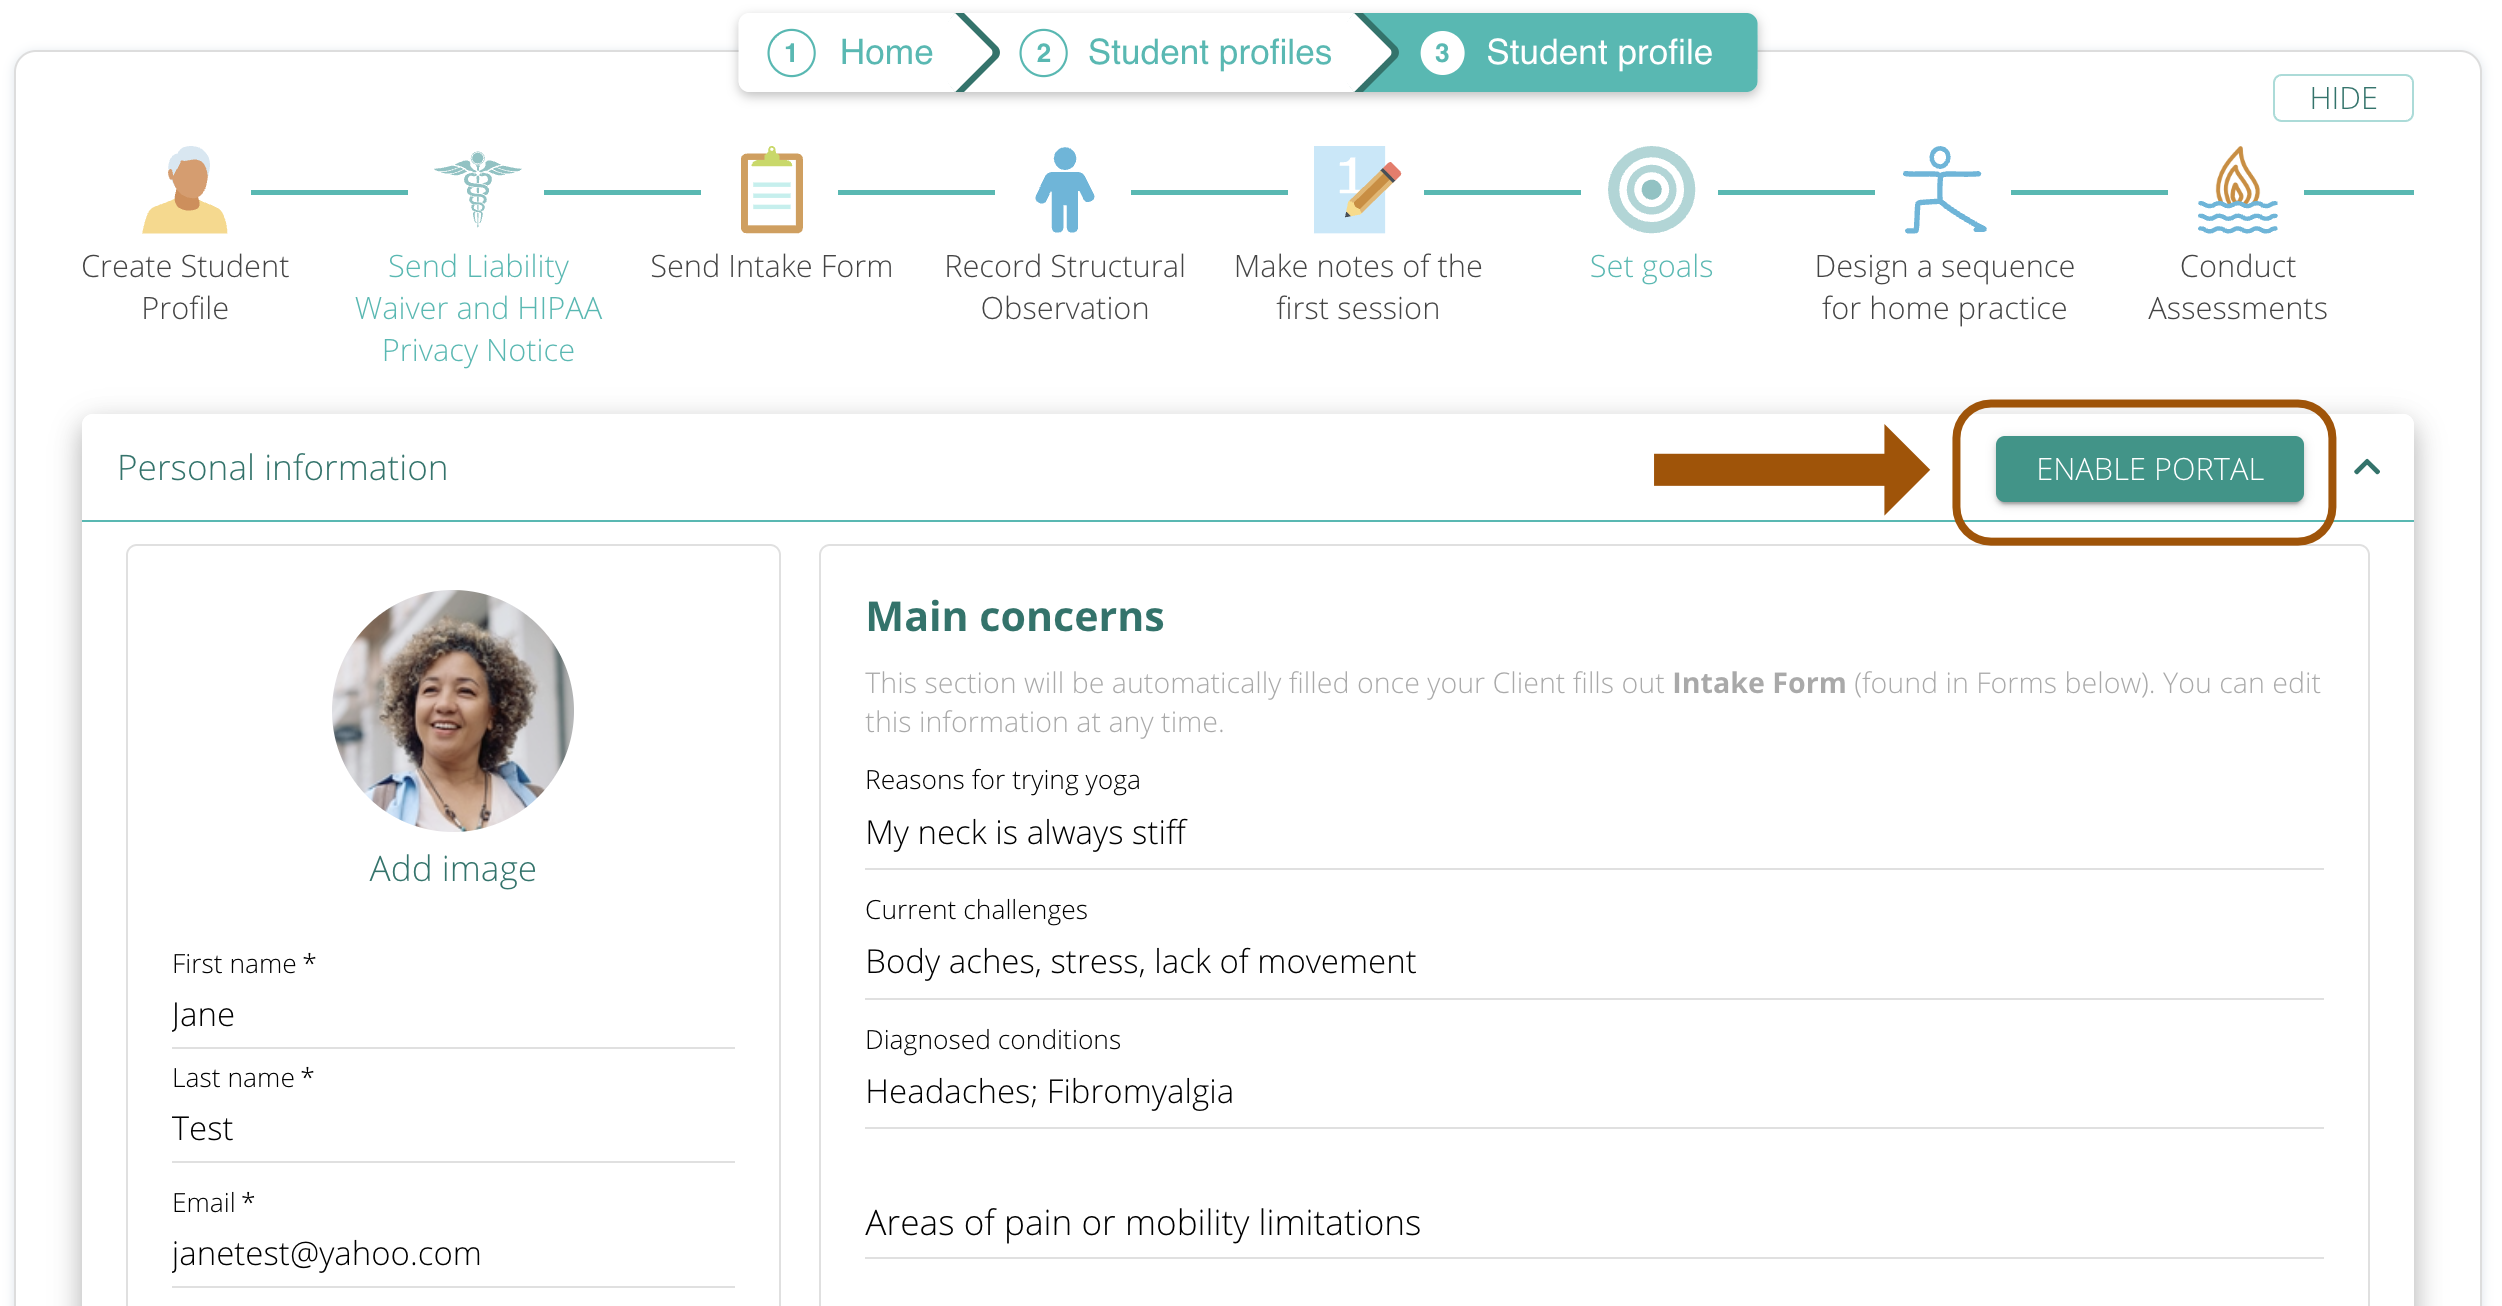
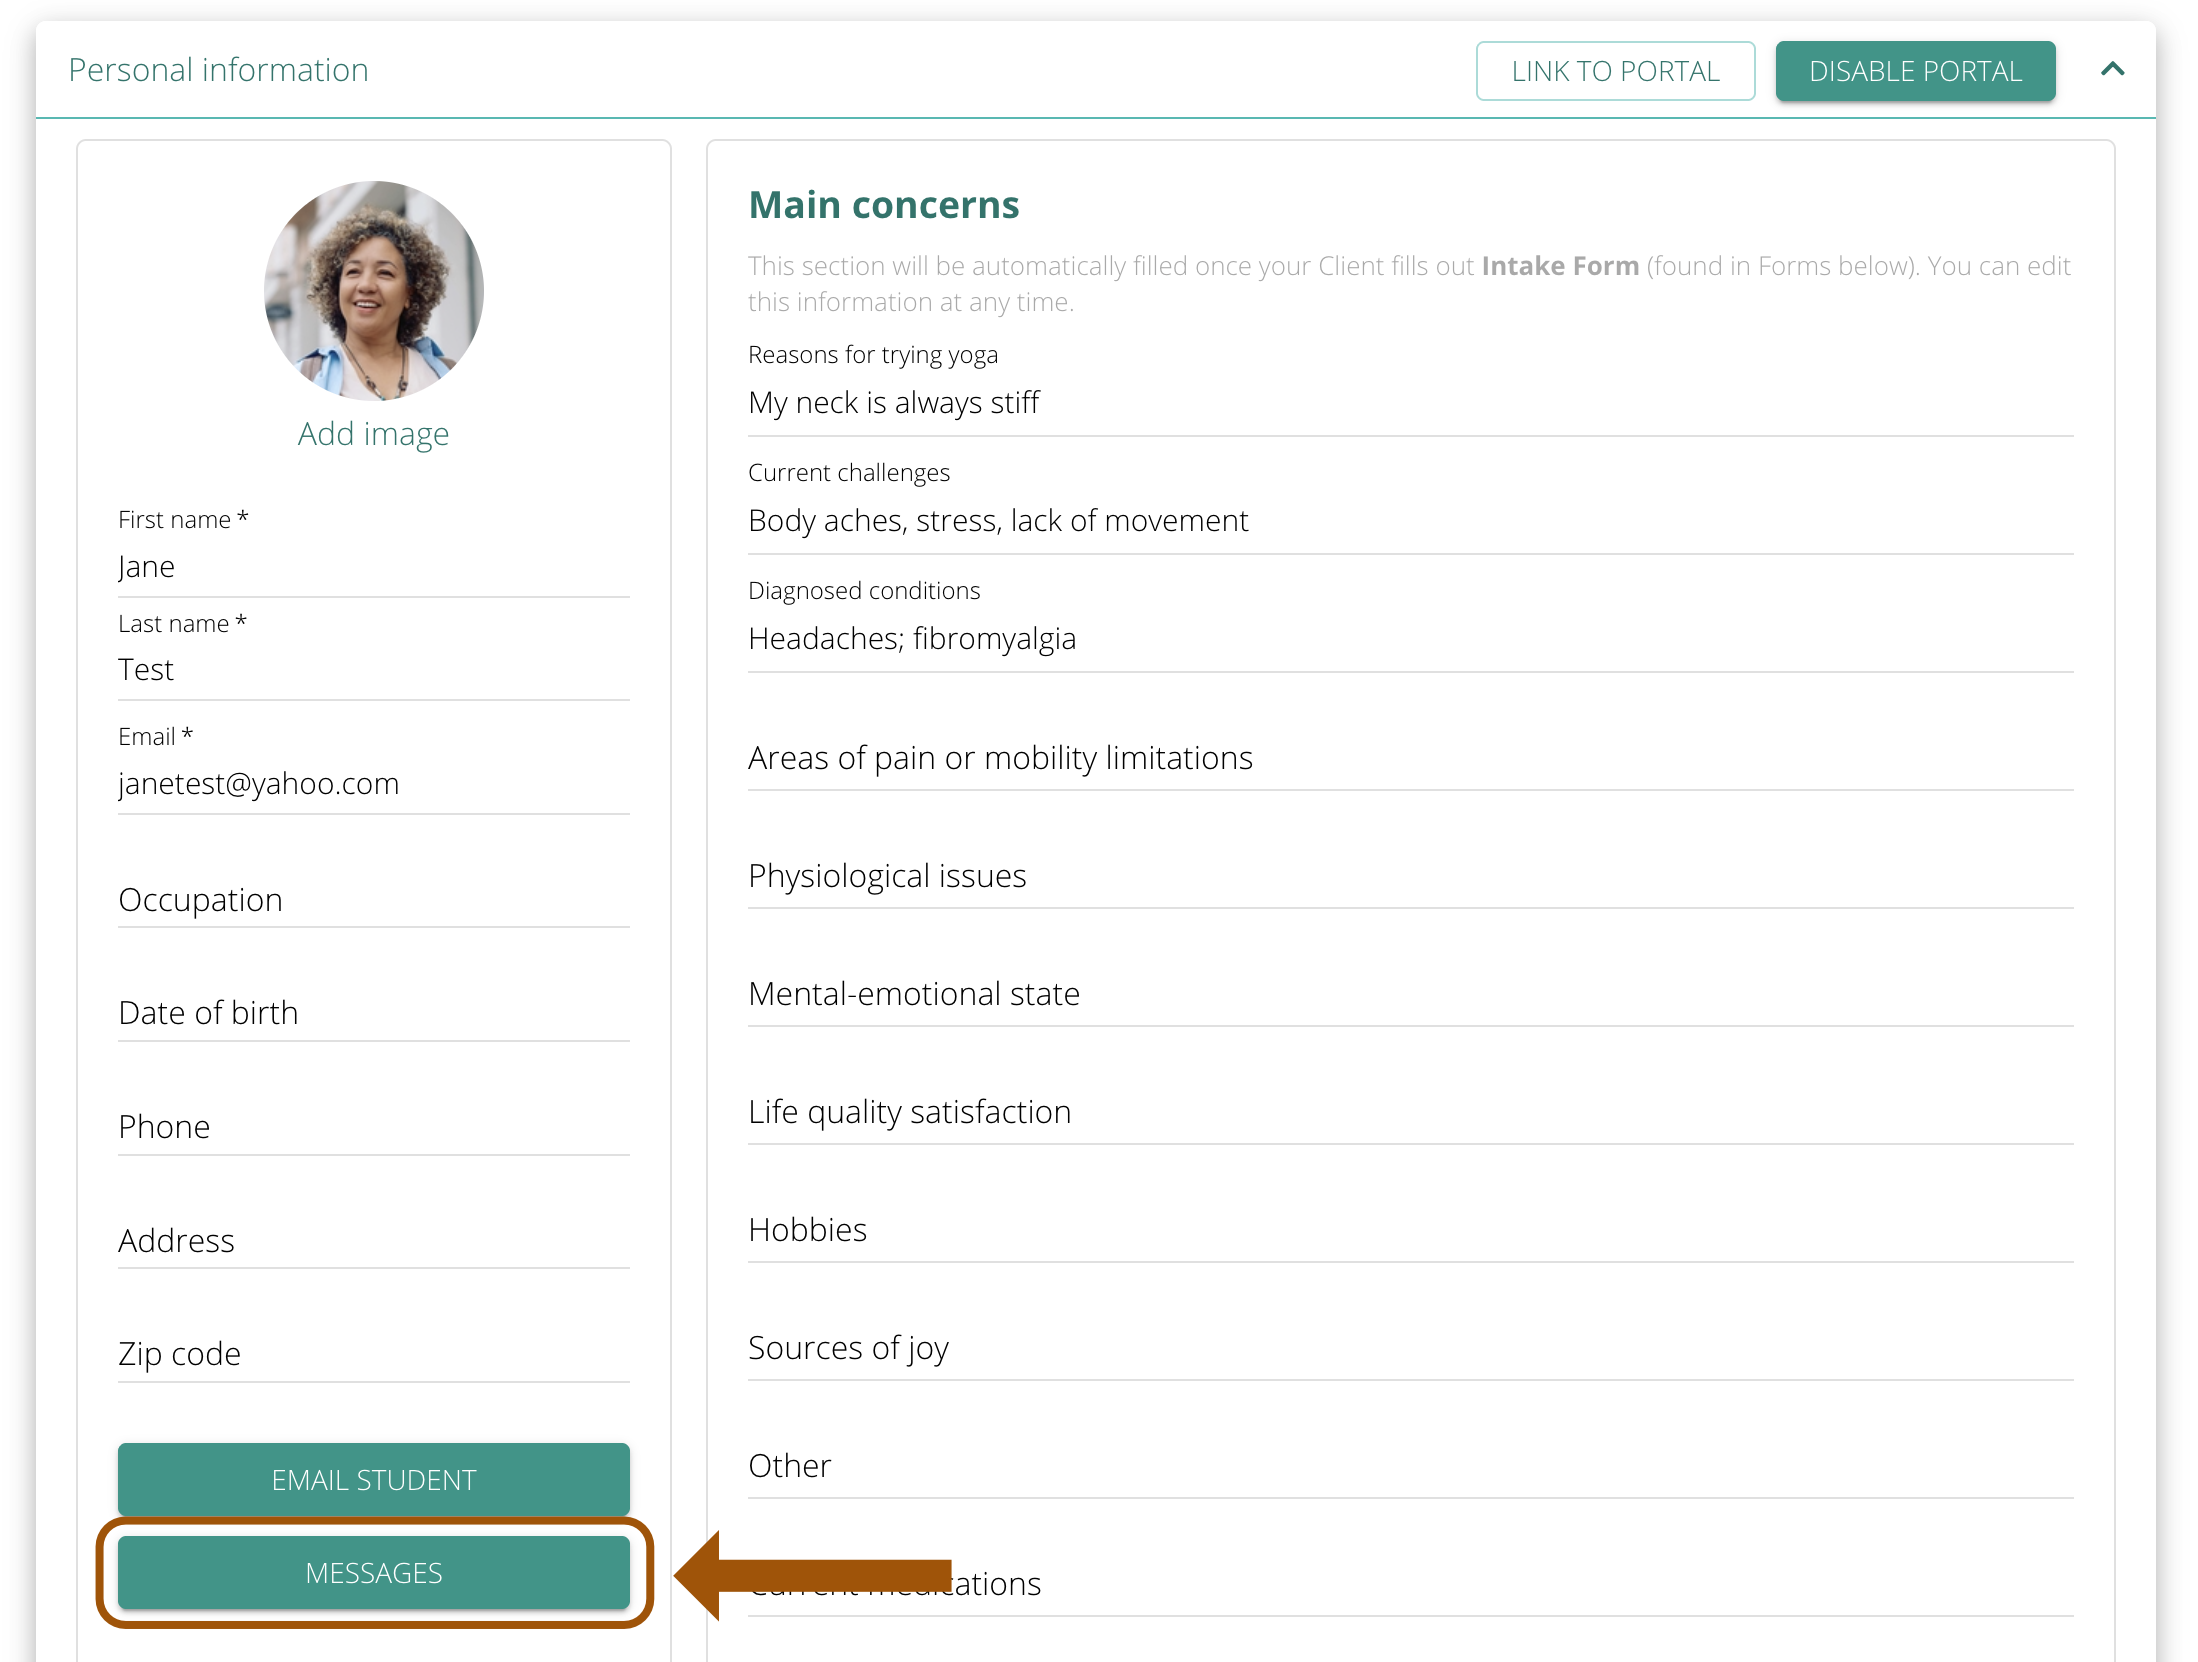
To enable Student Portal for a specific student, go to the Student’s Profile and click “Enable Portal.”
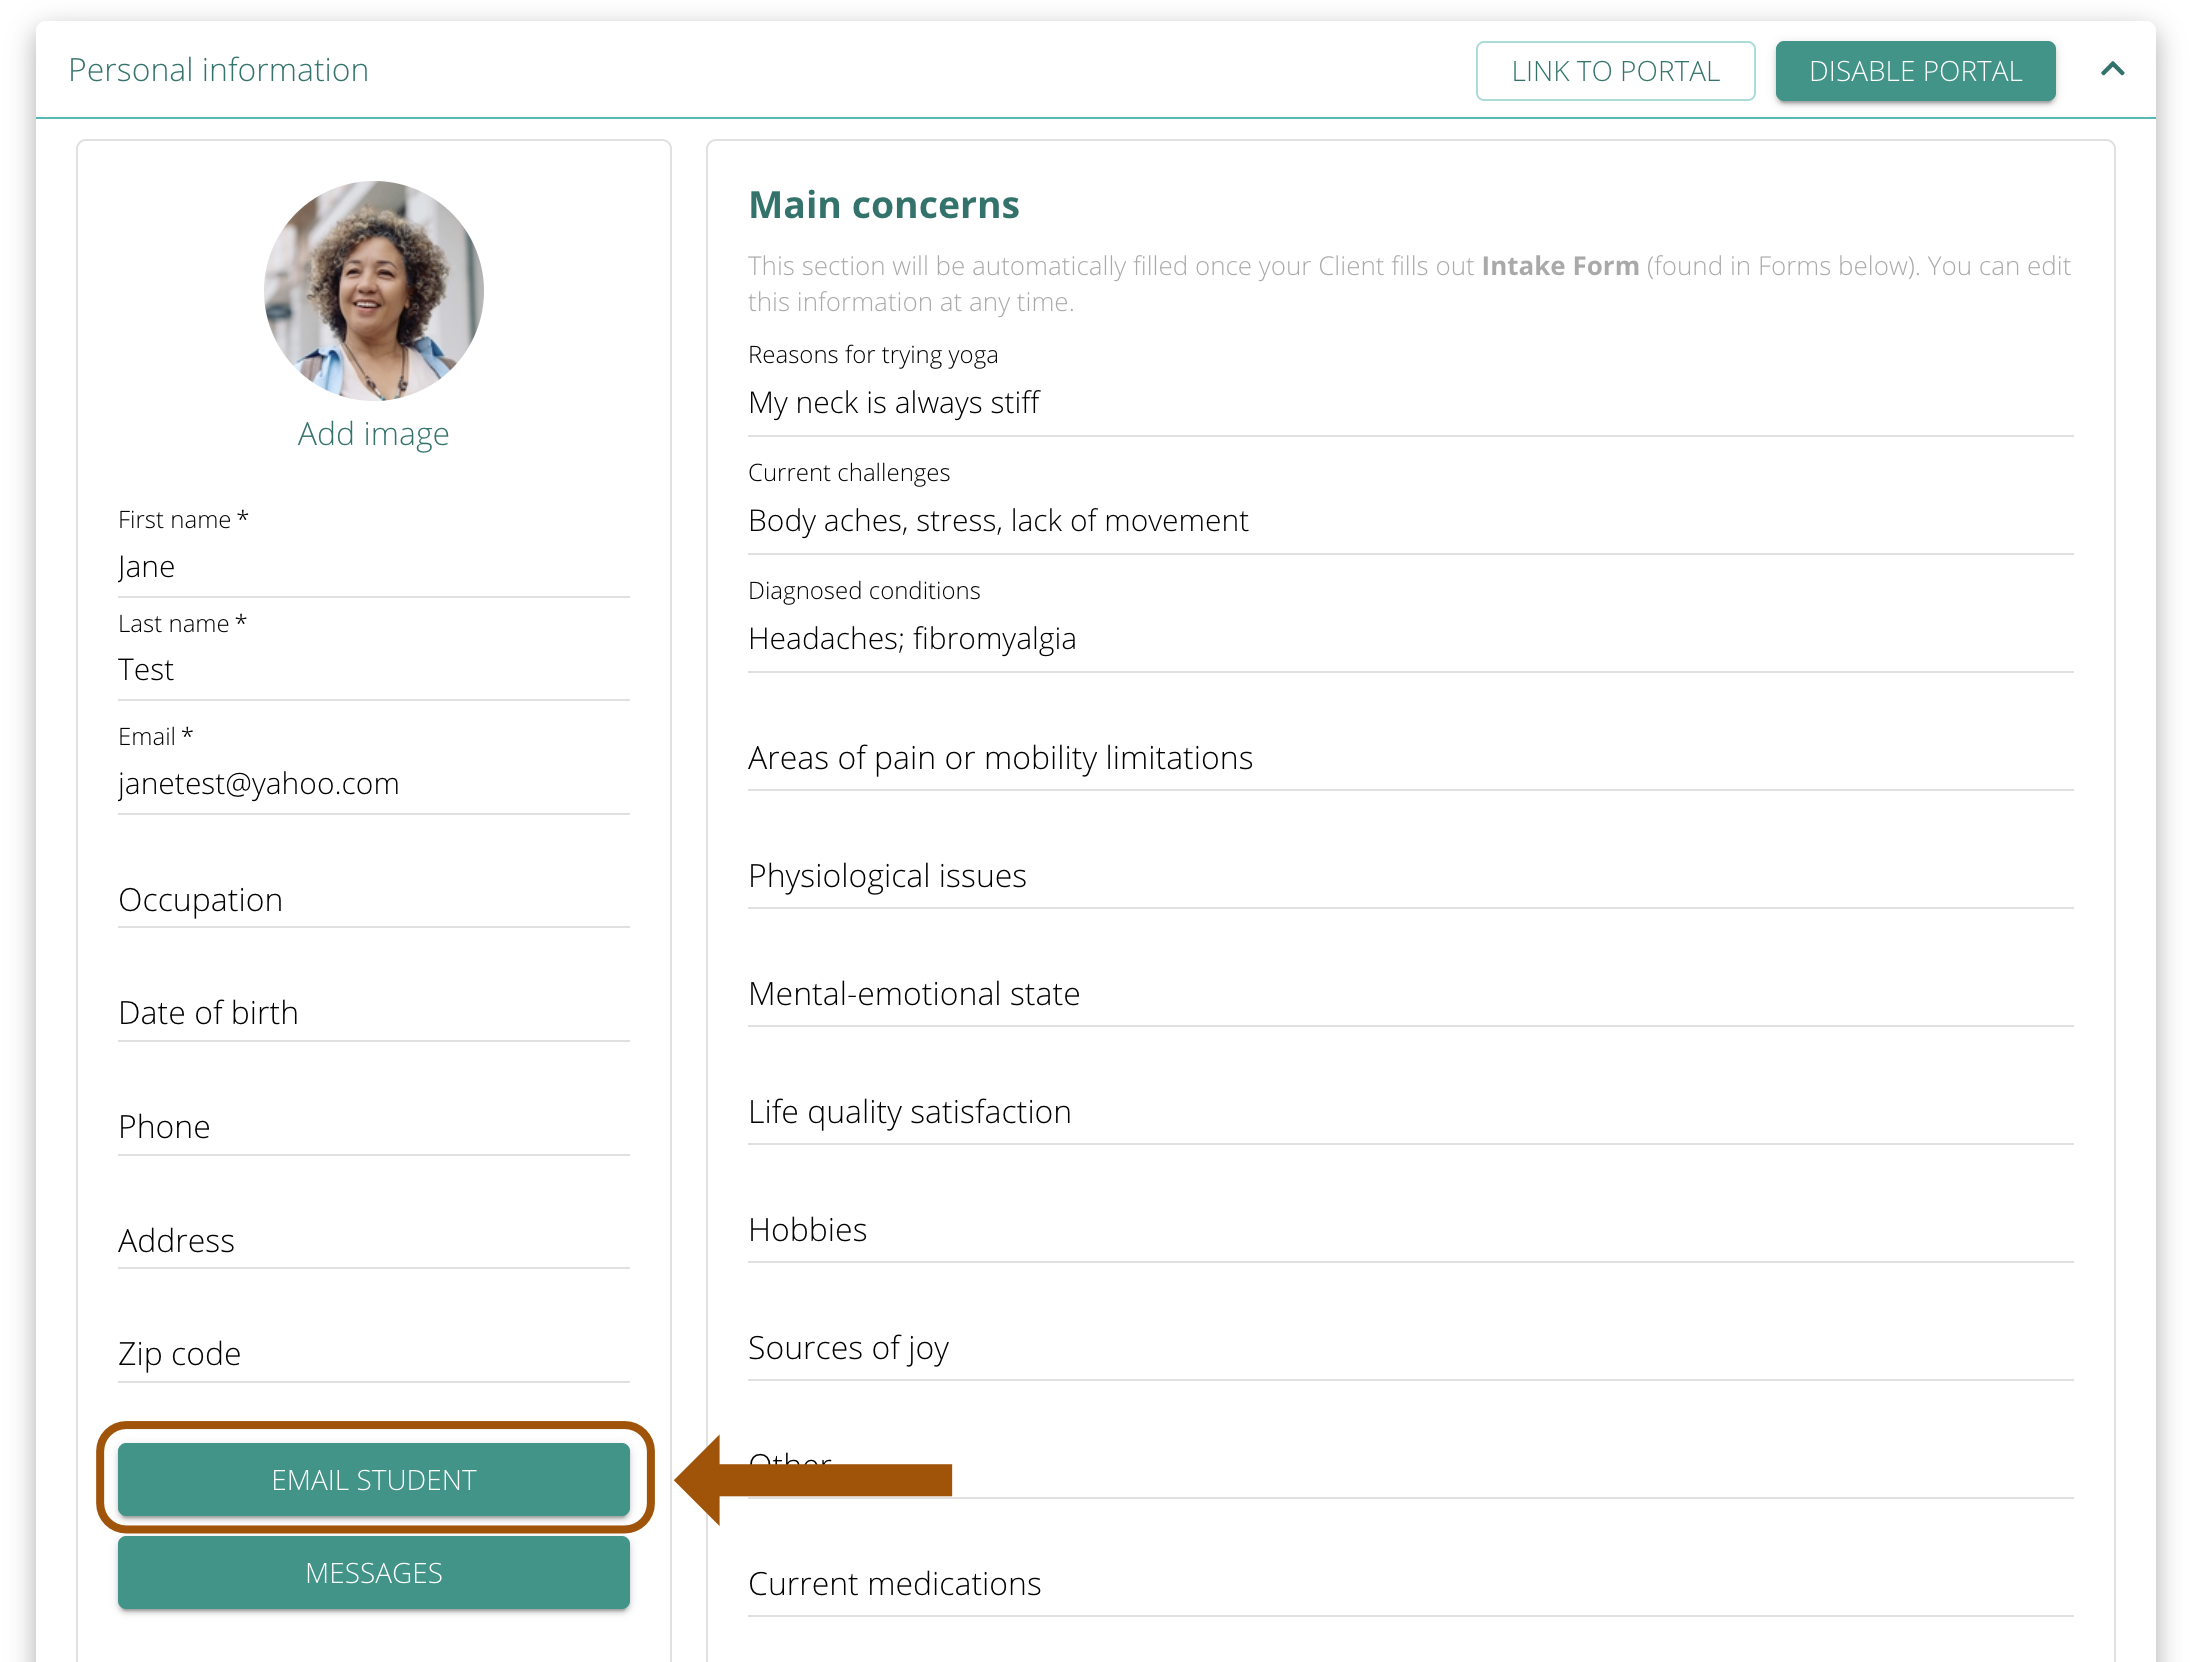
To preview Student’s Portal, click on Link to Portal in Student Profile.
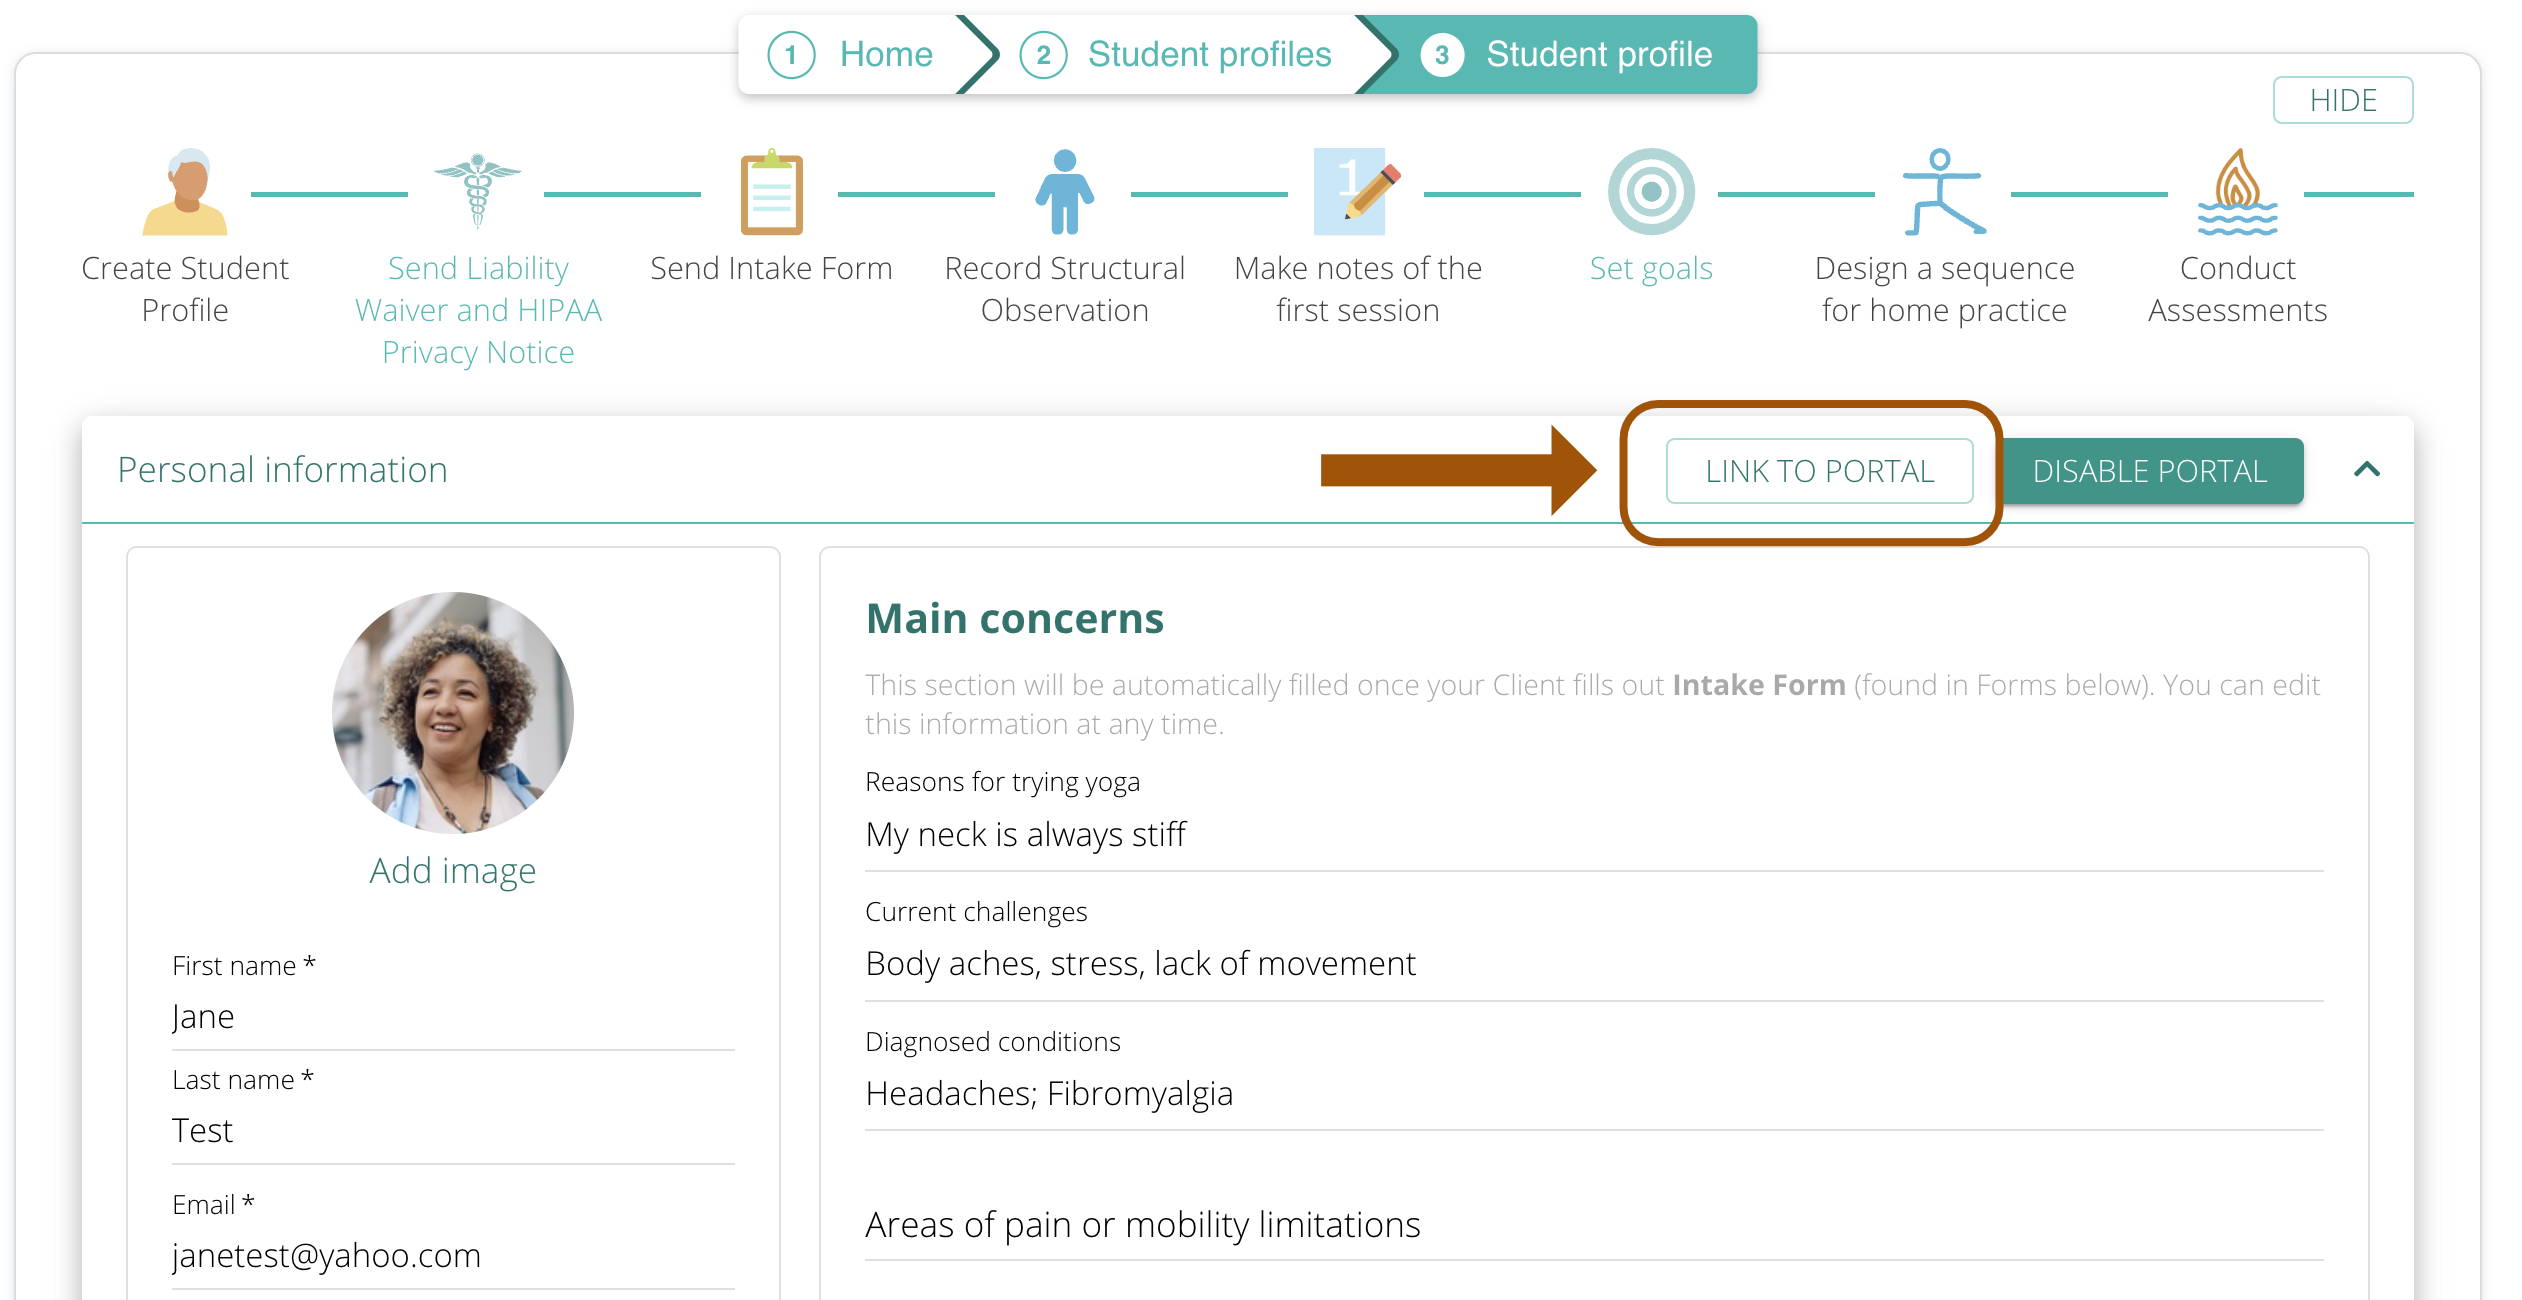
Copy the generated link and paste it into your browser.

You will be able to preview your Student’s Portal at any time.
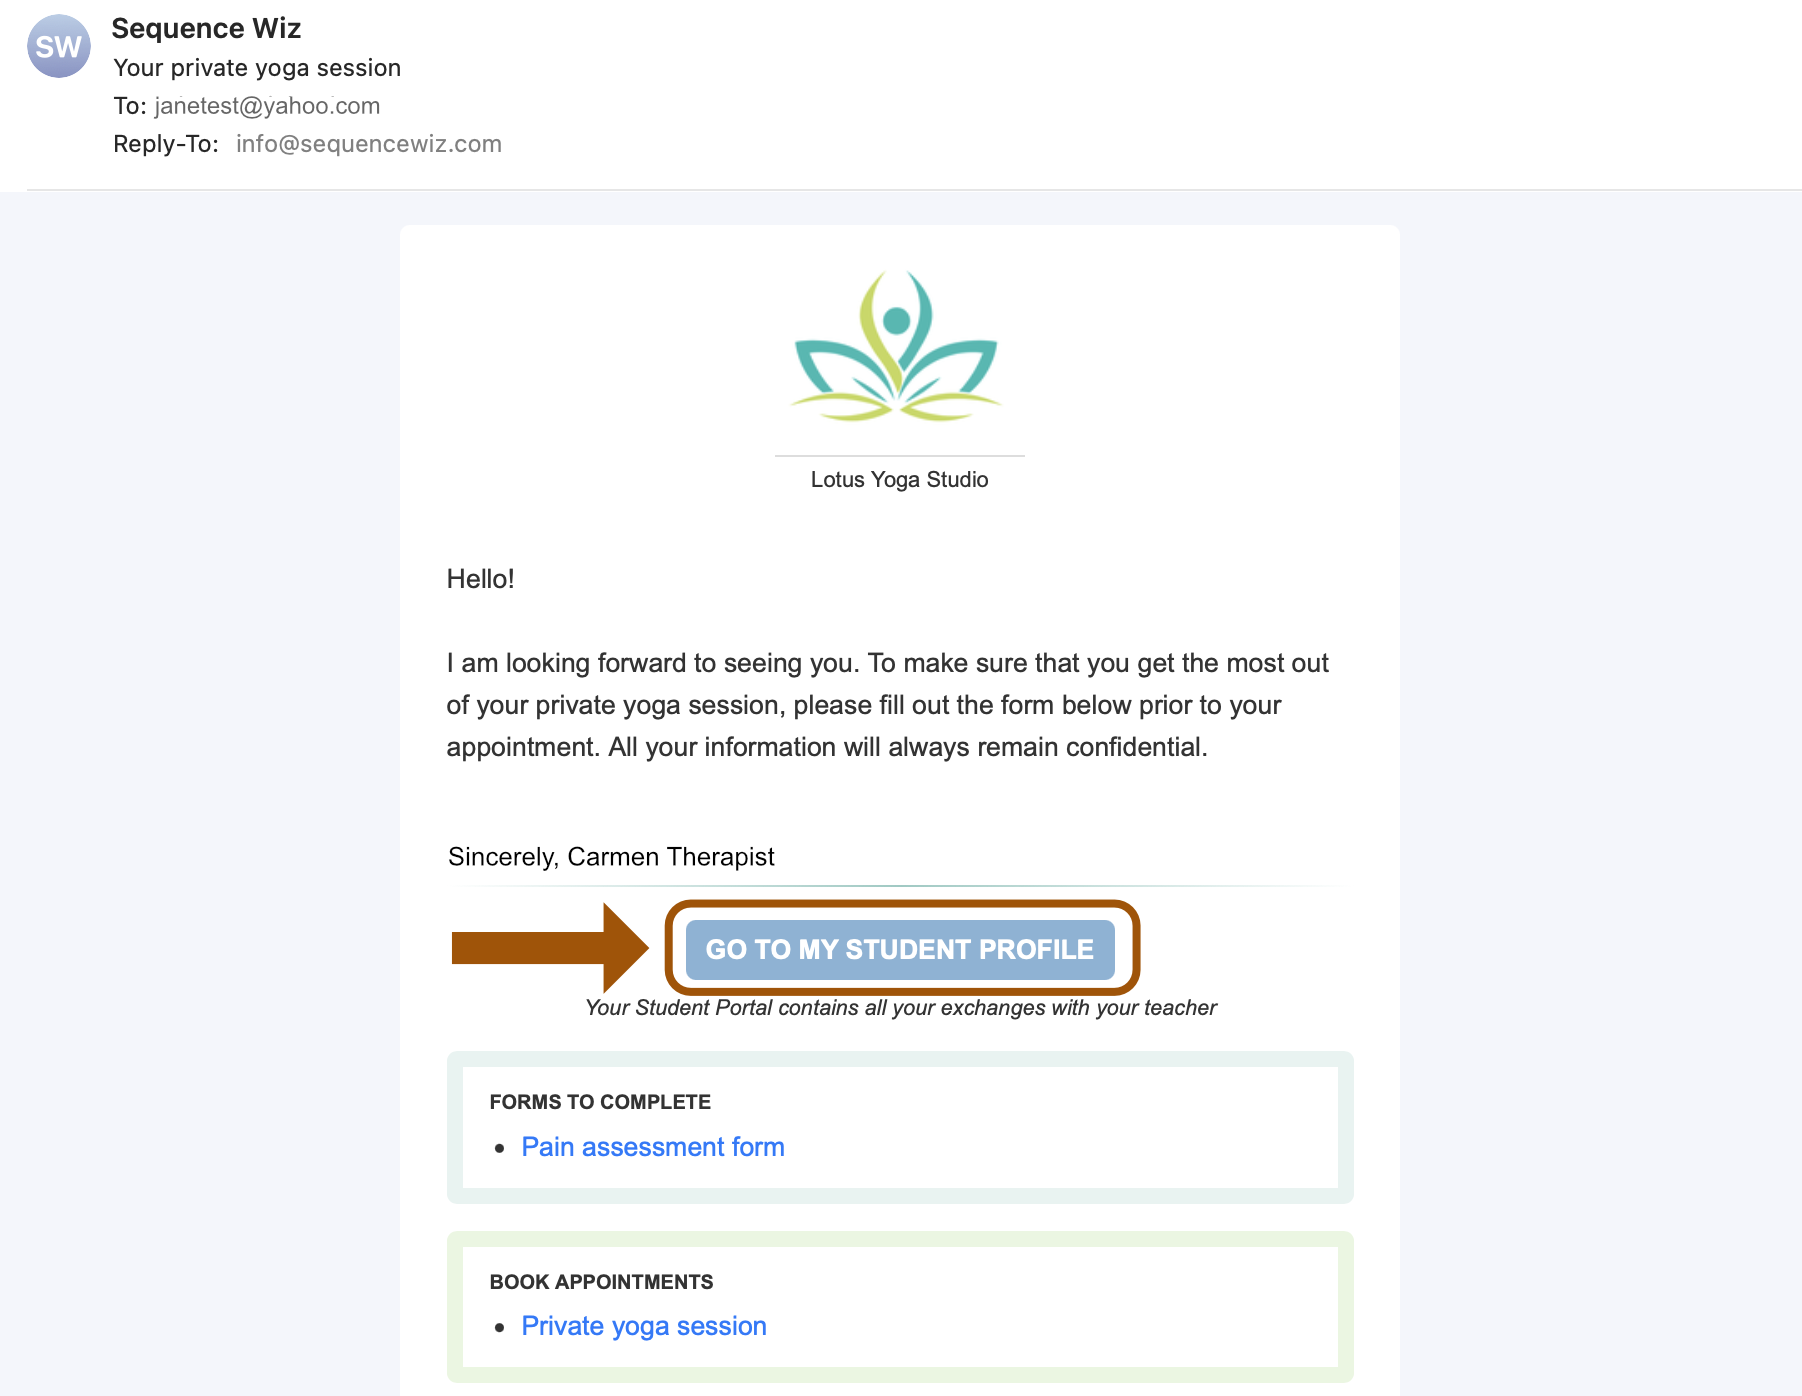
A link to the Student Portal is included in every email you send them using Email Student button.
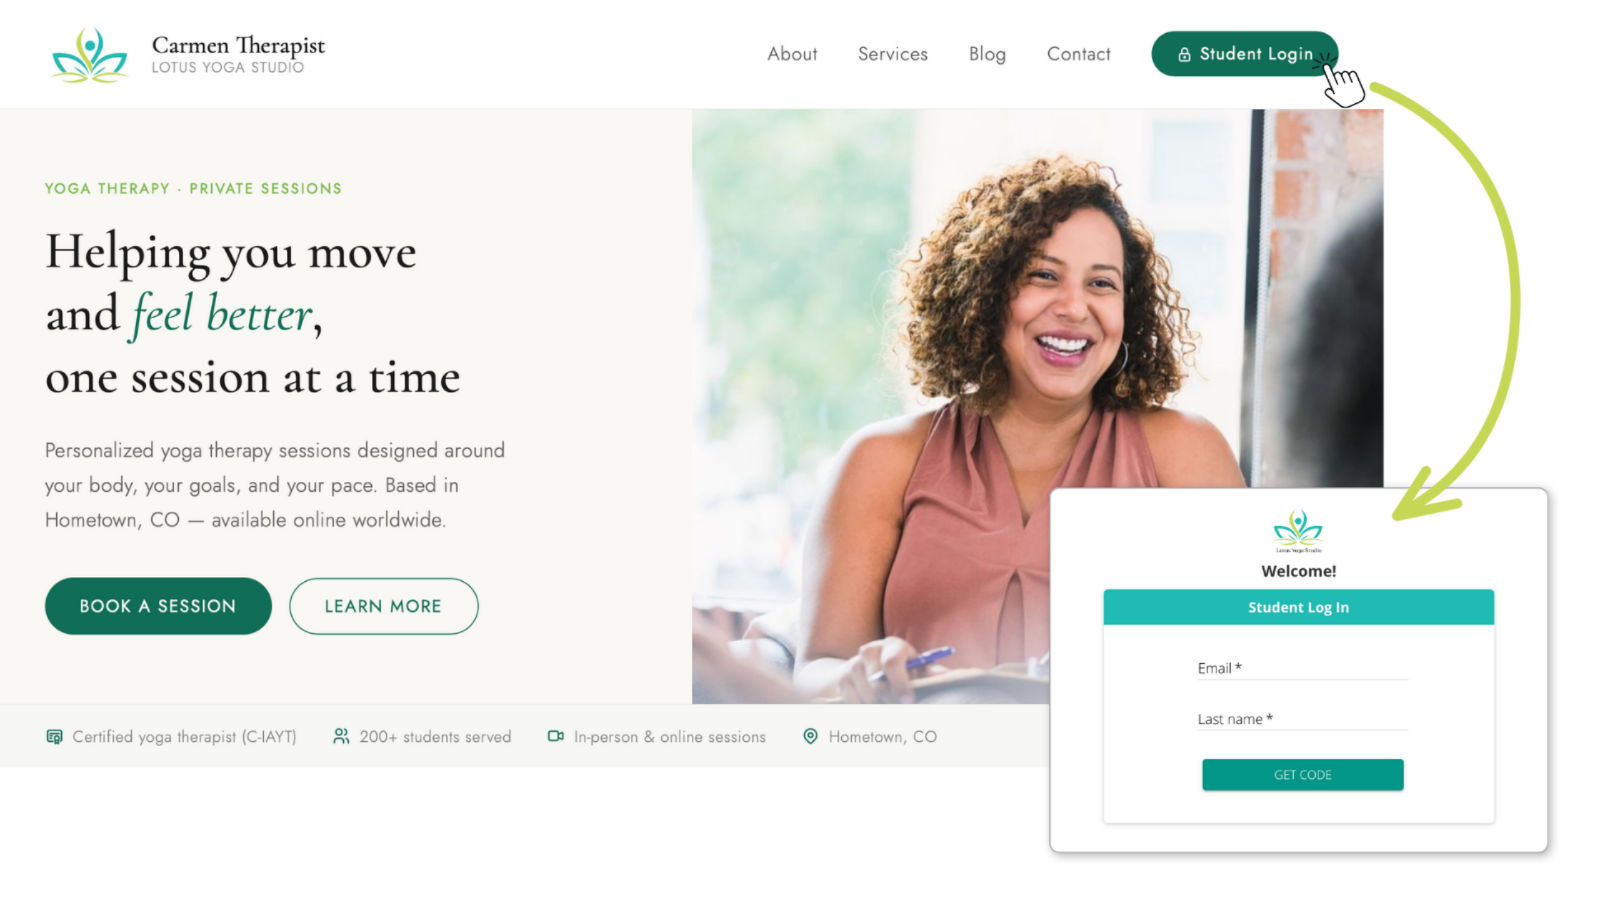
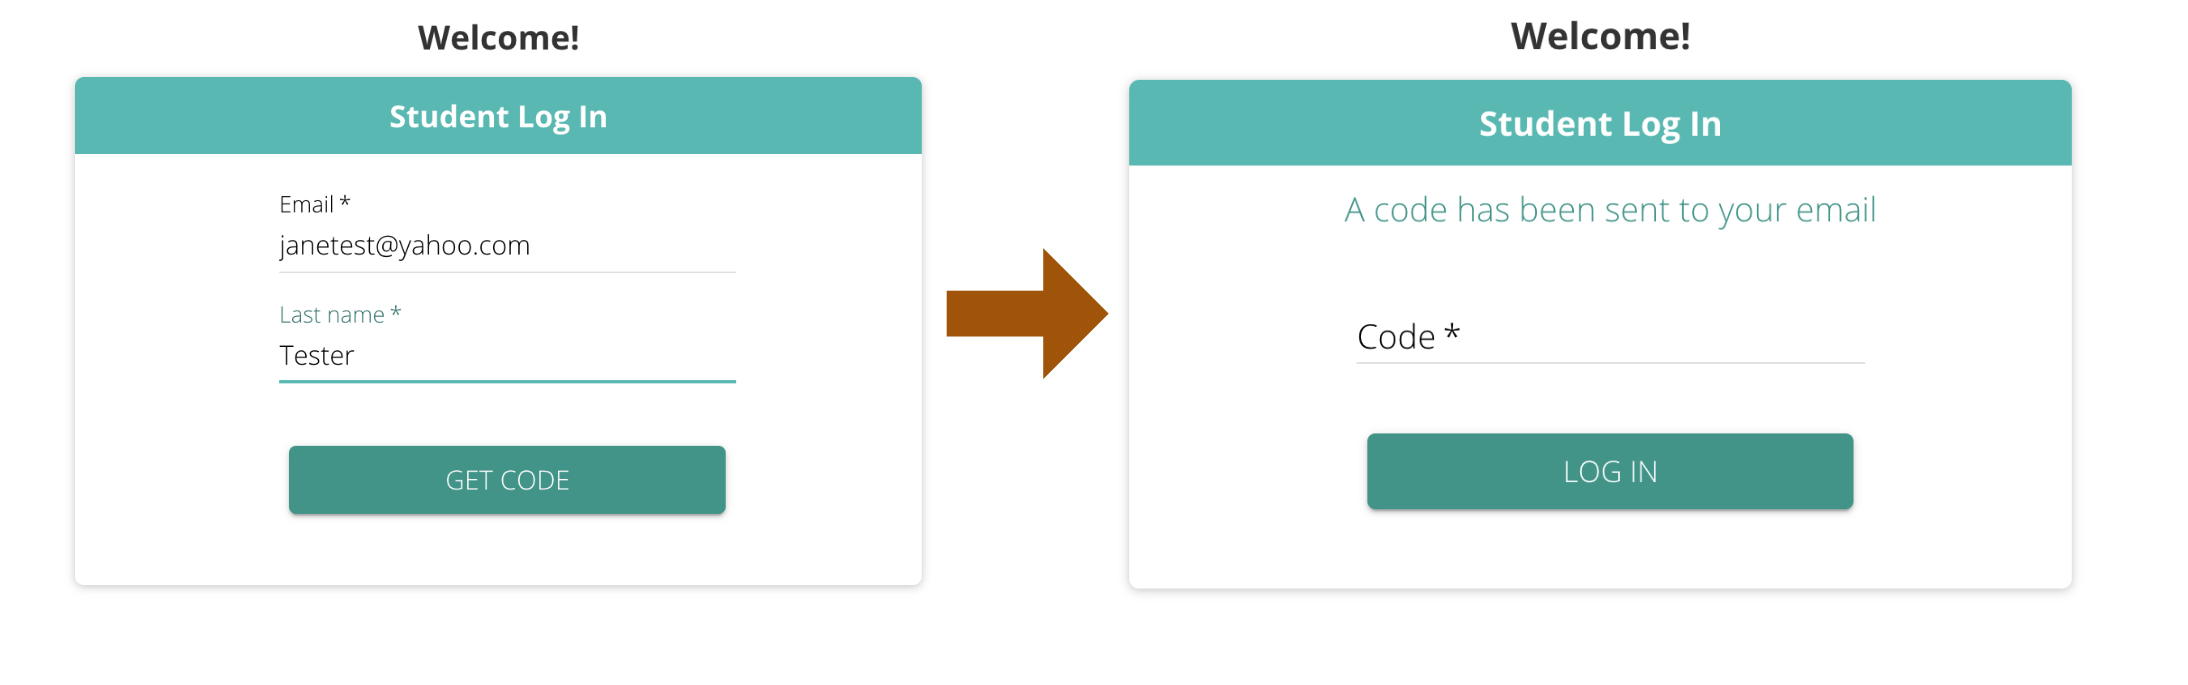
You can add a link to your website and call it something like Student login. All students with activated portals will be able to log in there using their last name and email.
You can add a link to your website and call it something like Student login. All students with activated portals will be able to log in there using their last name and email.
To enable general access, go to My Account > My Profile and click on ENABLE COMMON LINK TO PORTAL.
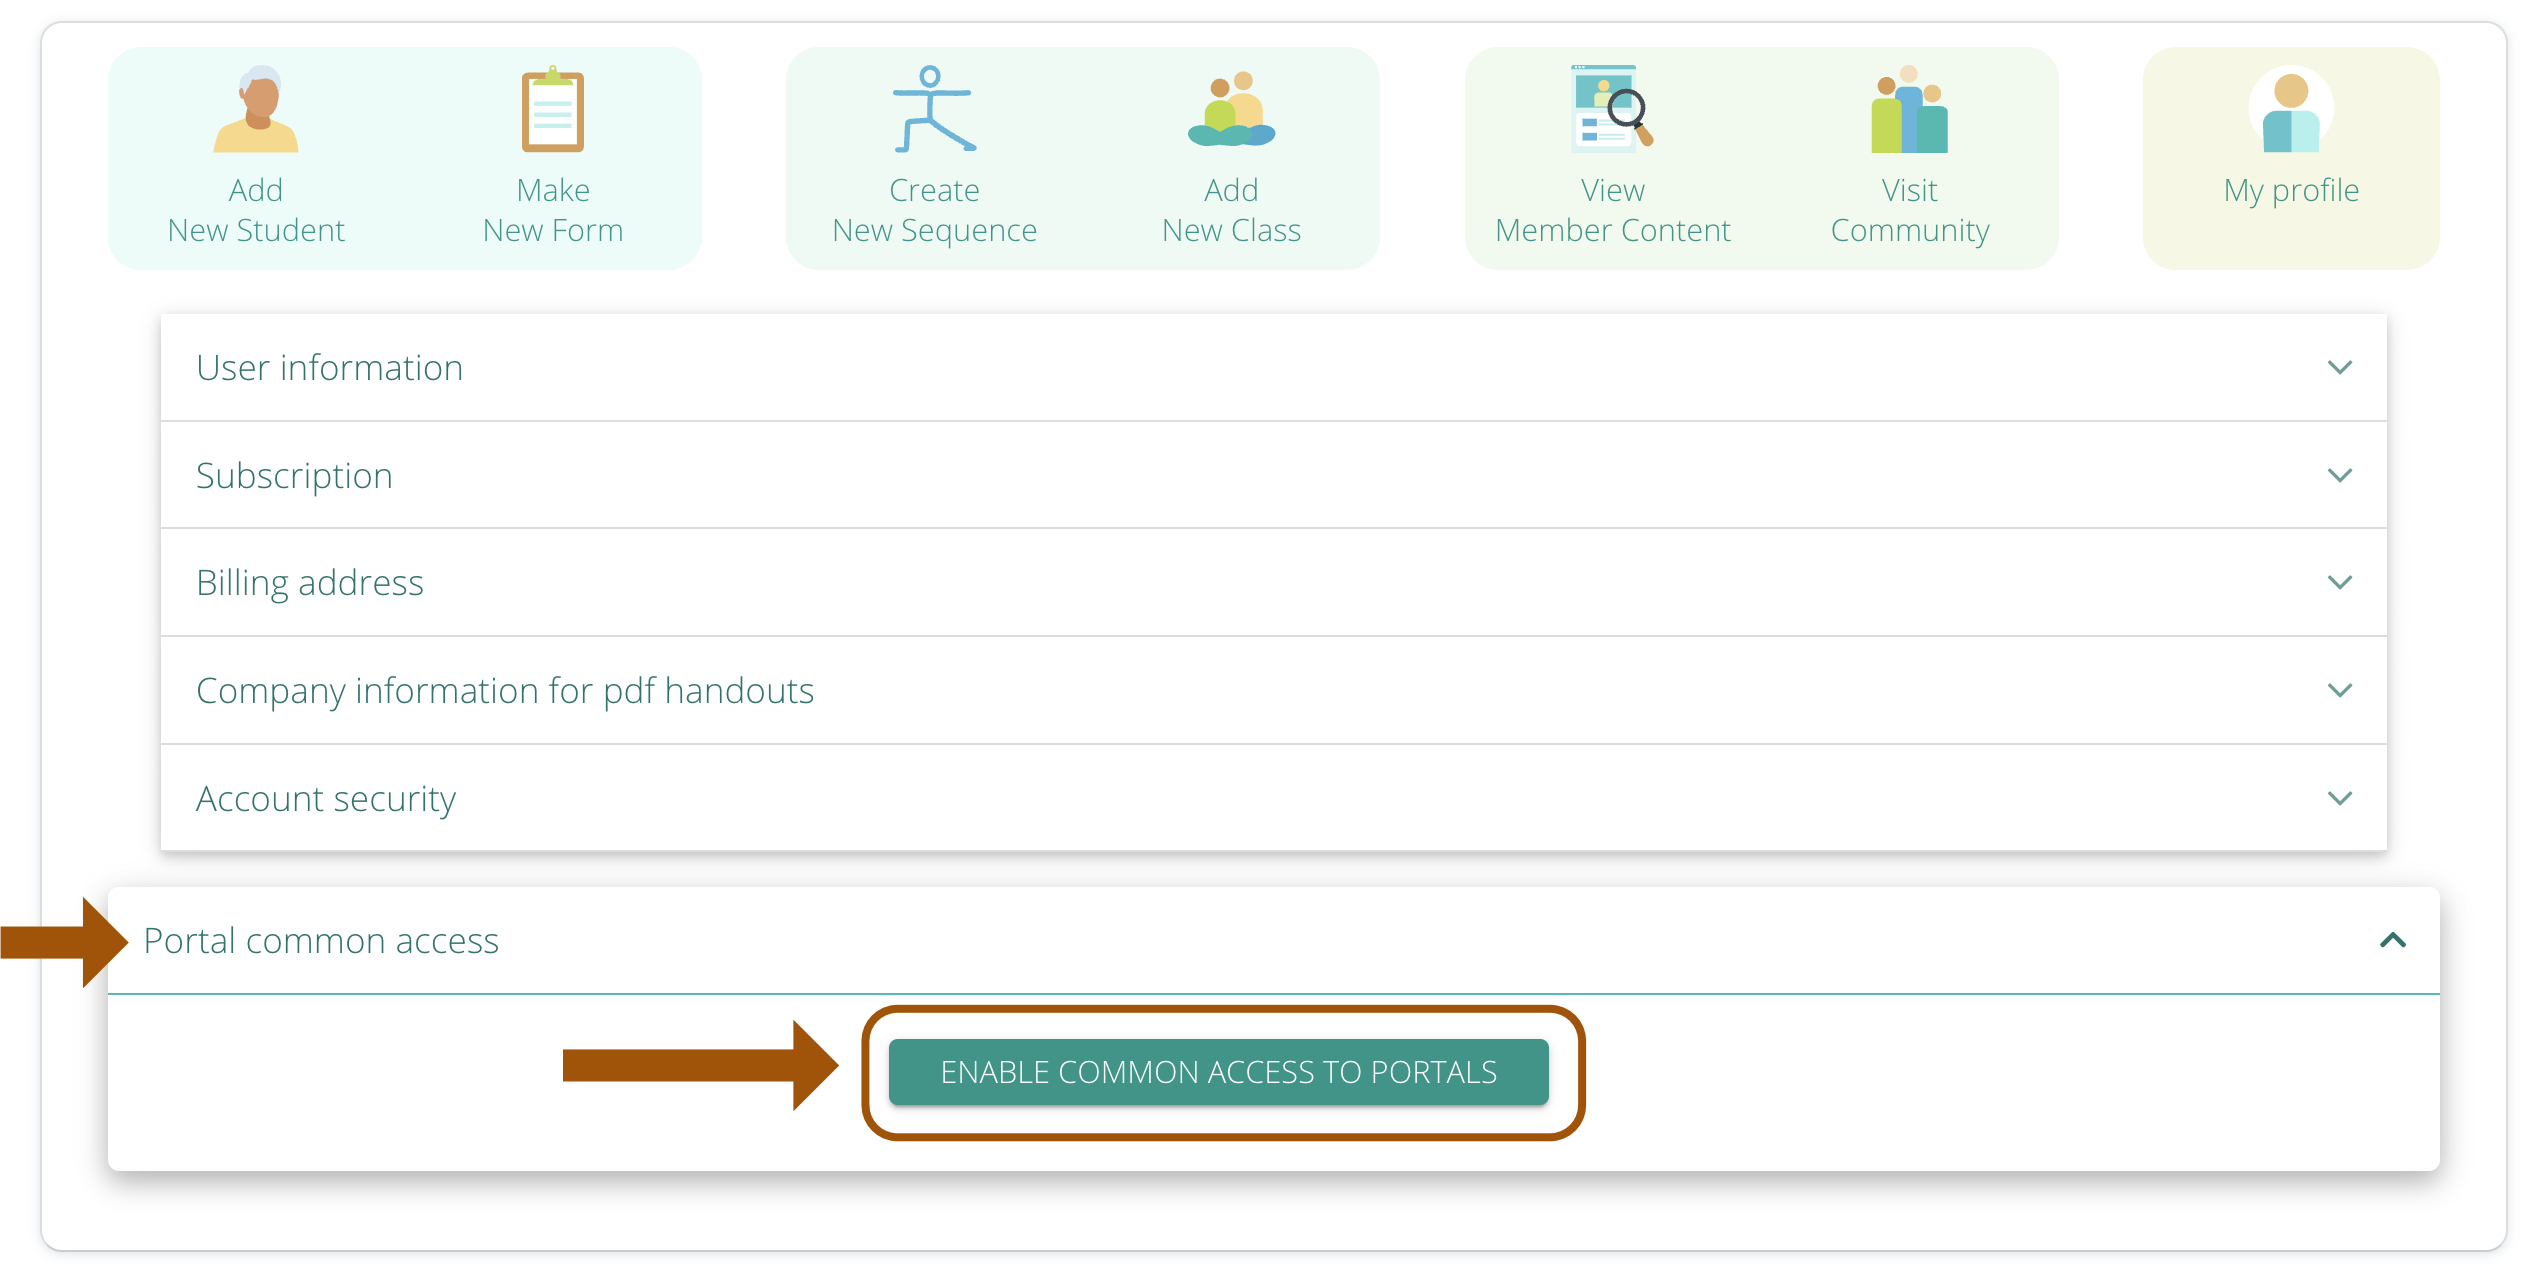
Copy the link that shows up


and add it to any button, page, mail, newsletter - whatever you like. When your students click on that link, they will see the access page and will be able to login there.
To ensure student privacy, during the login process they will receive a log in code in their email that they will enter to view their portal. The code stays active for 10 minutes.
Send new materials the way you already do: Use the “Email Student” button and everything you include lands in their portal automatically.
All scheduled appointments will be added automatically.
You can add specific older items to Student’s Portal from their Profile (see below).
You can add specific older items to Student’s Portal from their Profile
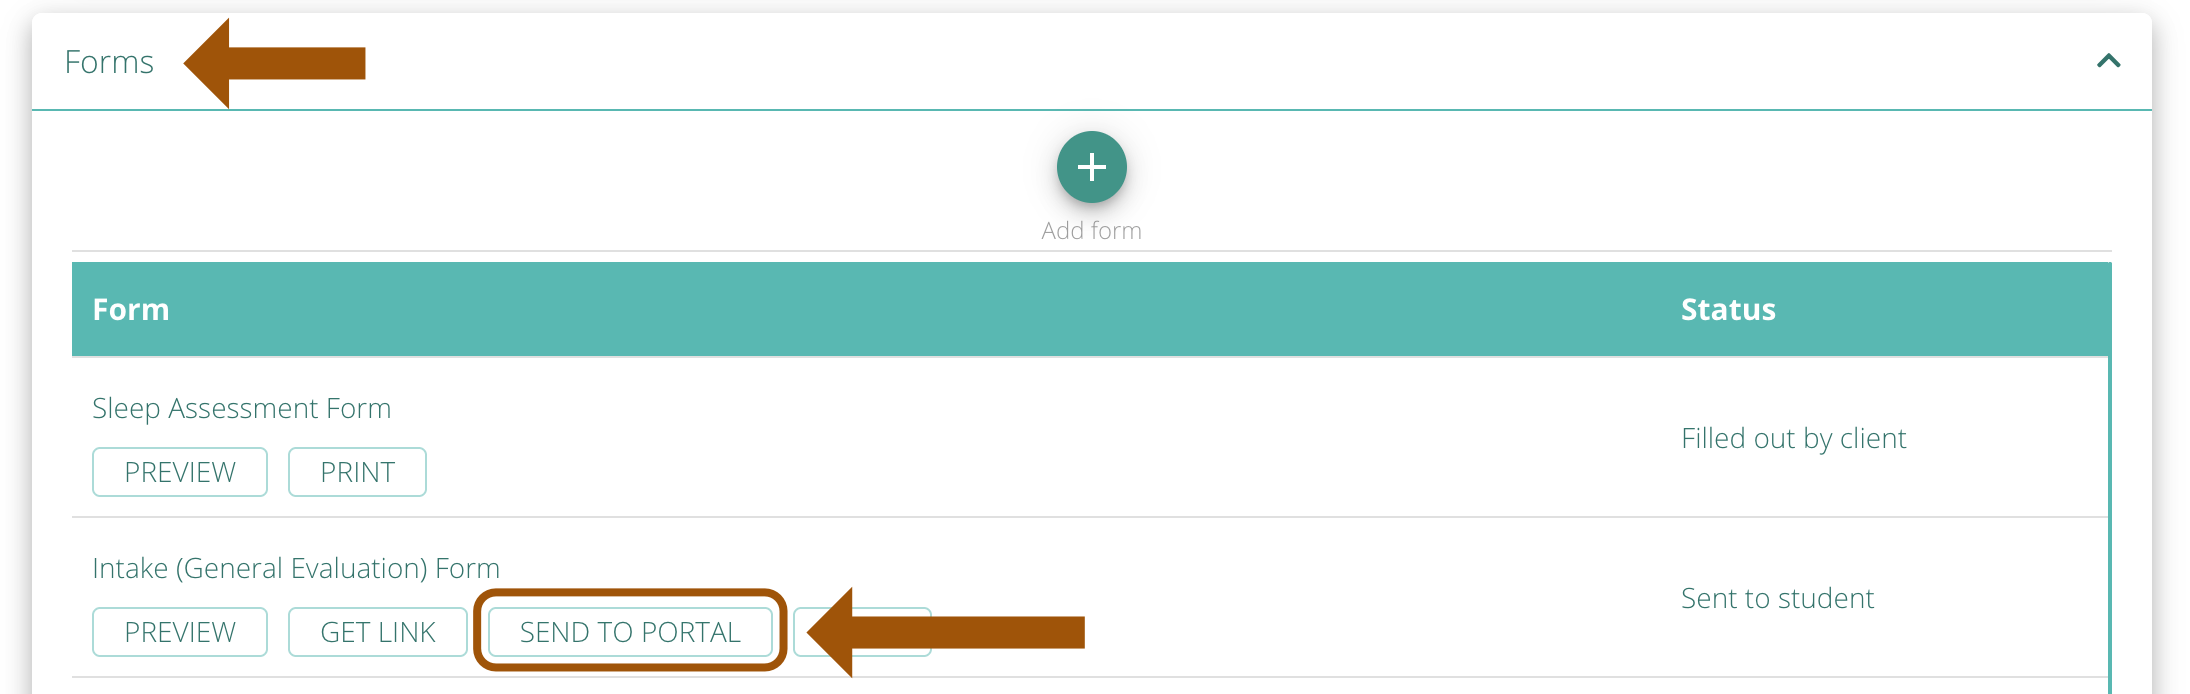
To add Forms, click on SEND PORTAL button on a specific form.
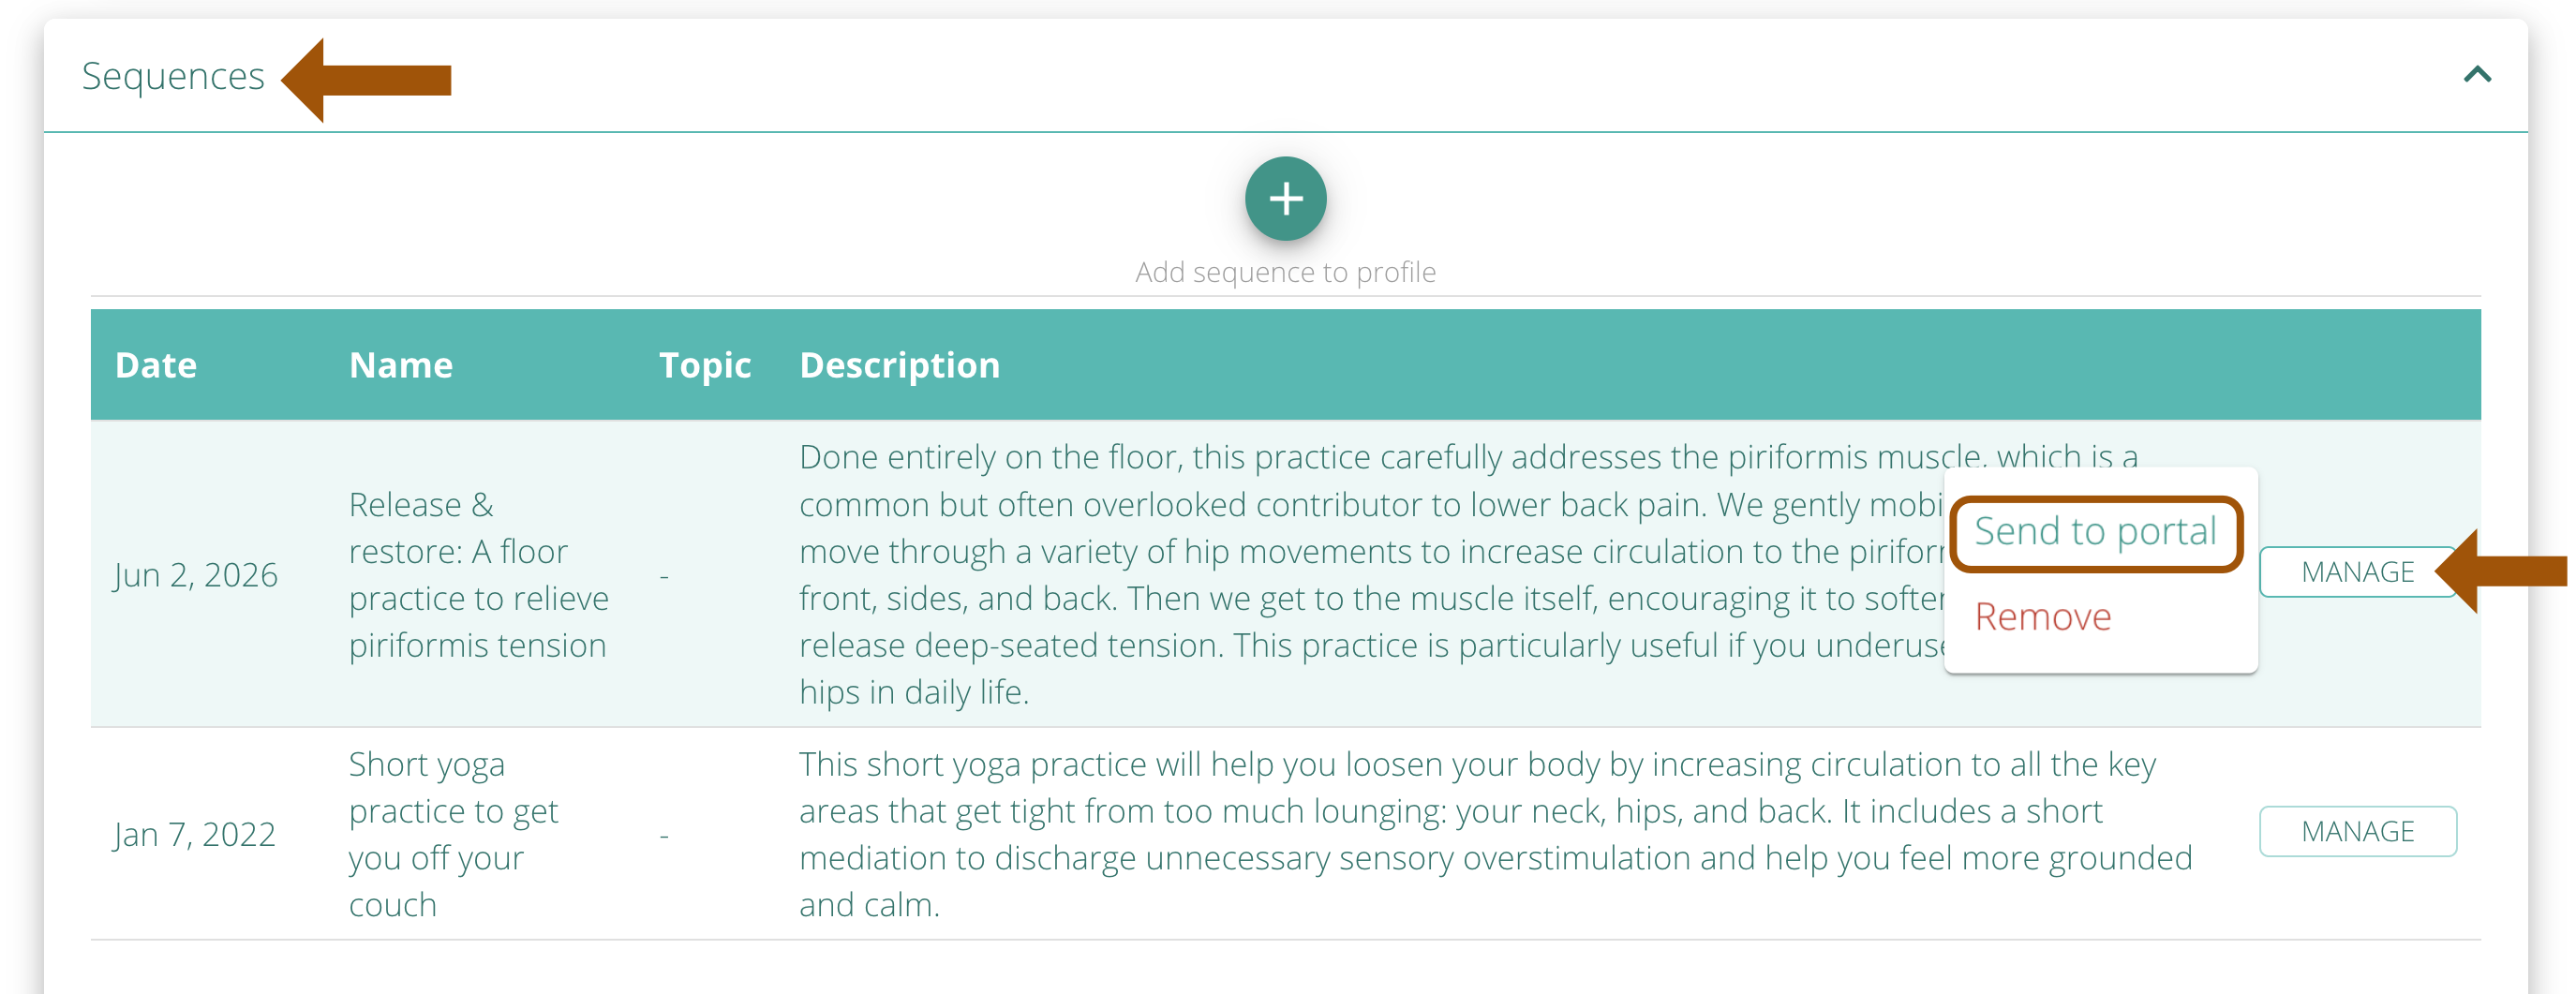
To add Sequences, click on MANAGE button on a specific sequence and choose Send to Portal.
To add Progress Report, click on SEND TO STUDENT PORTAL button within an individual Session Note.
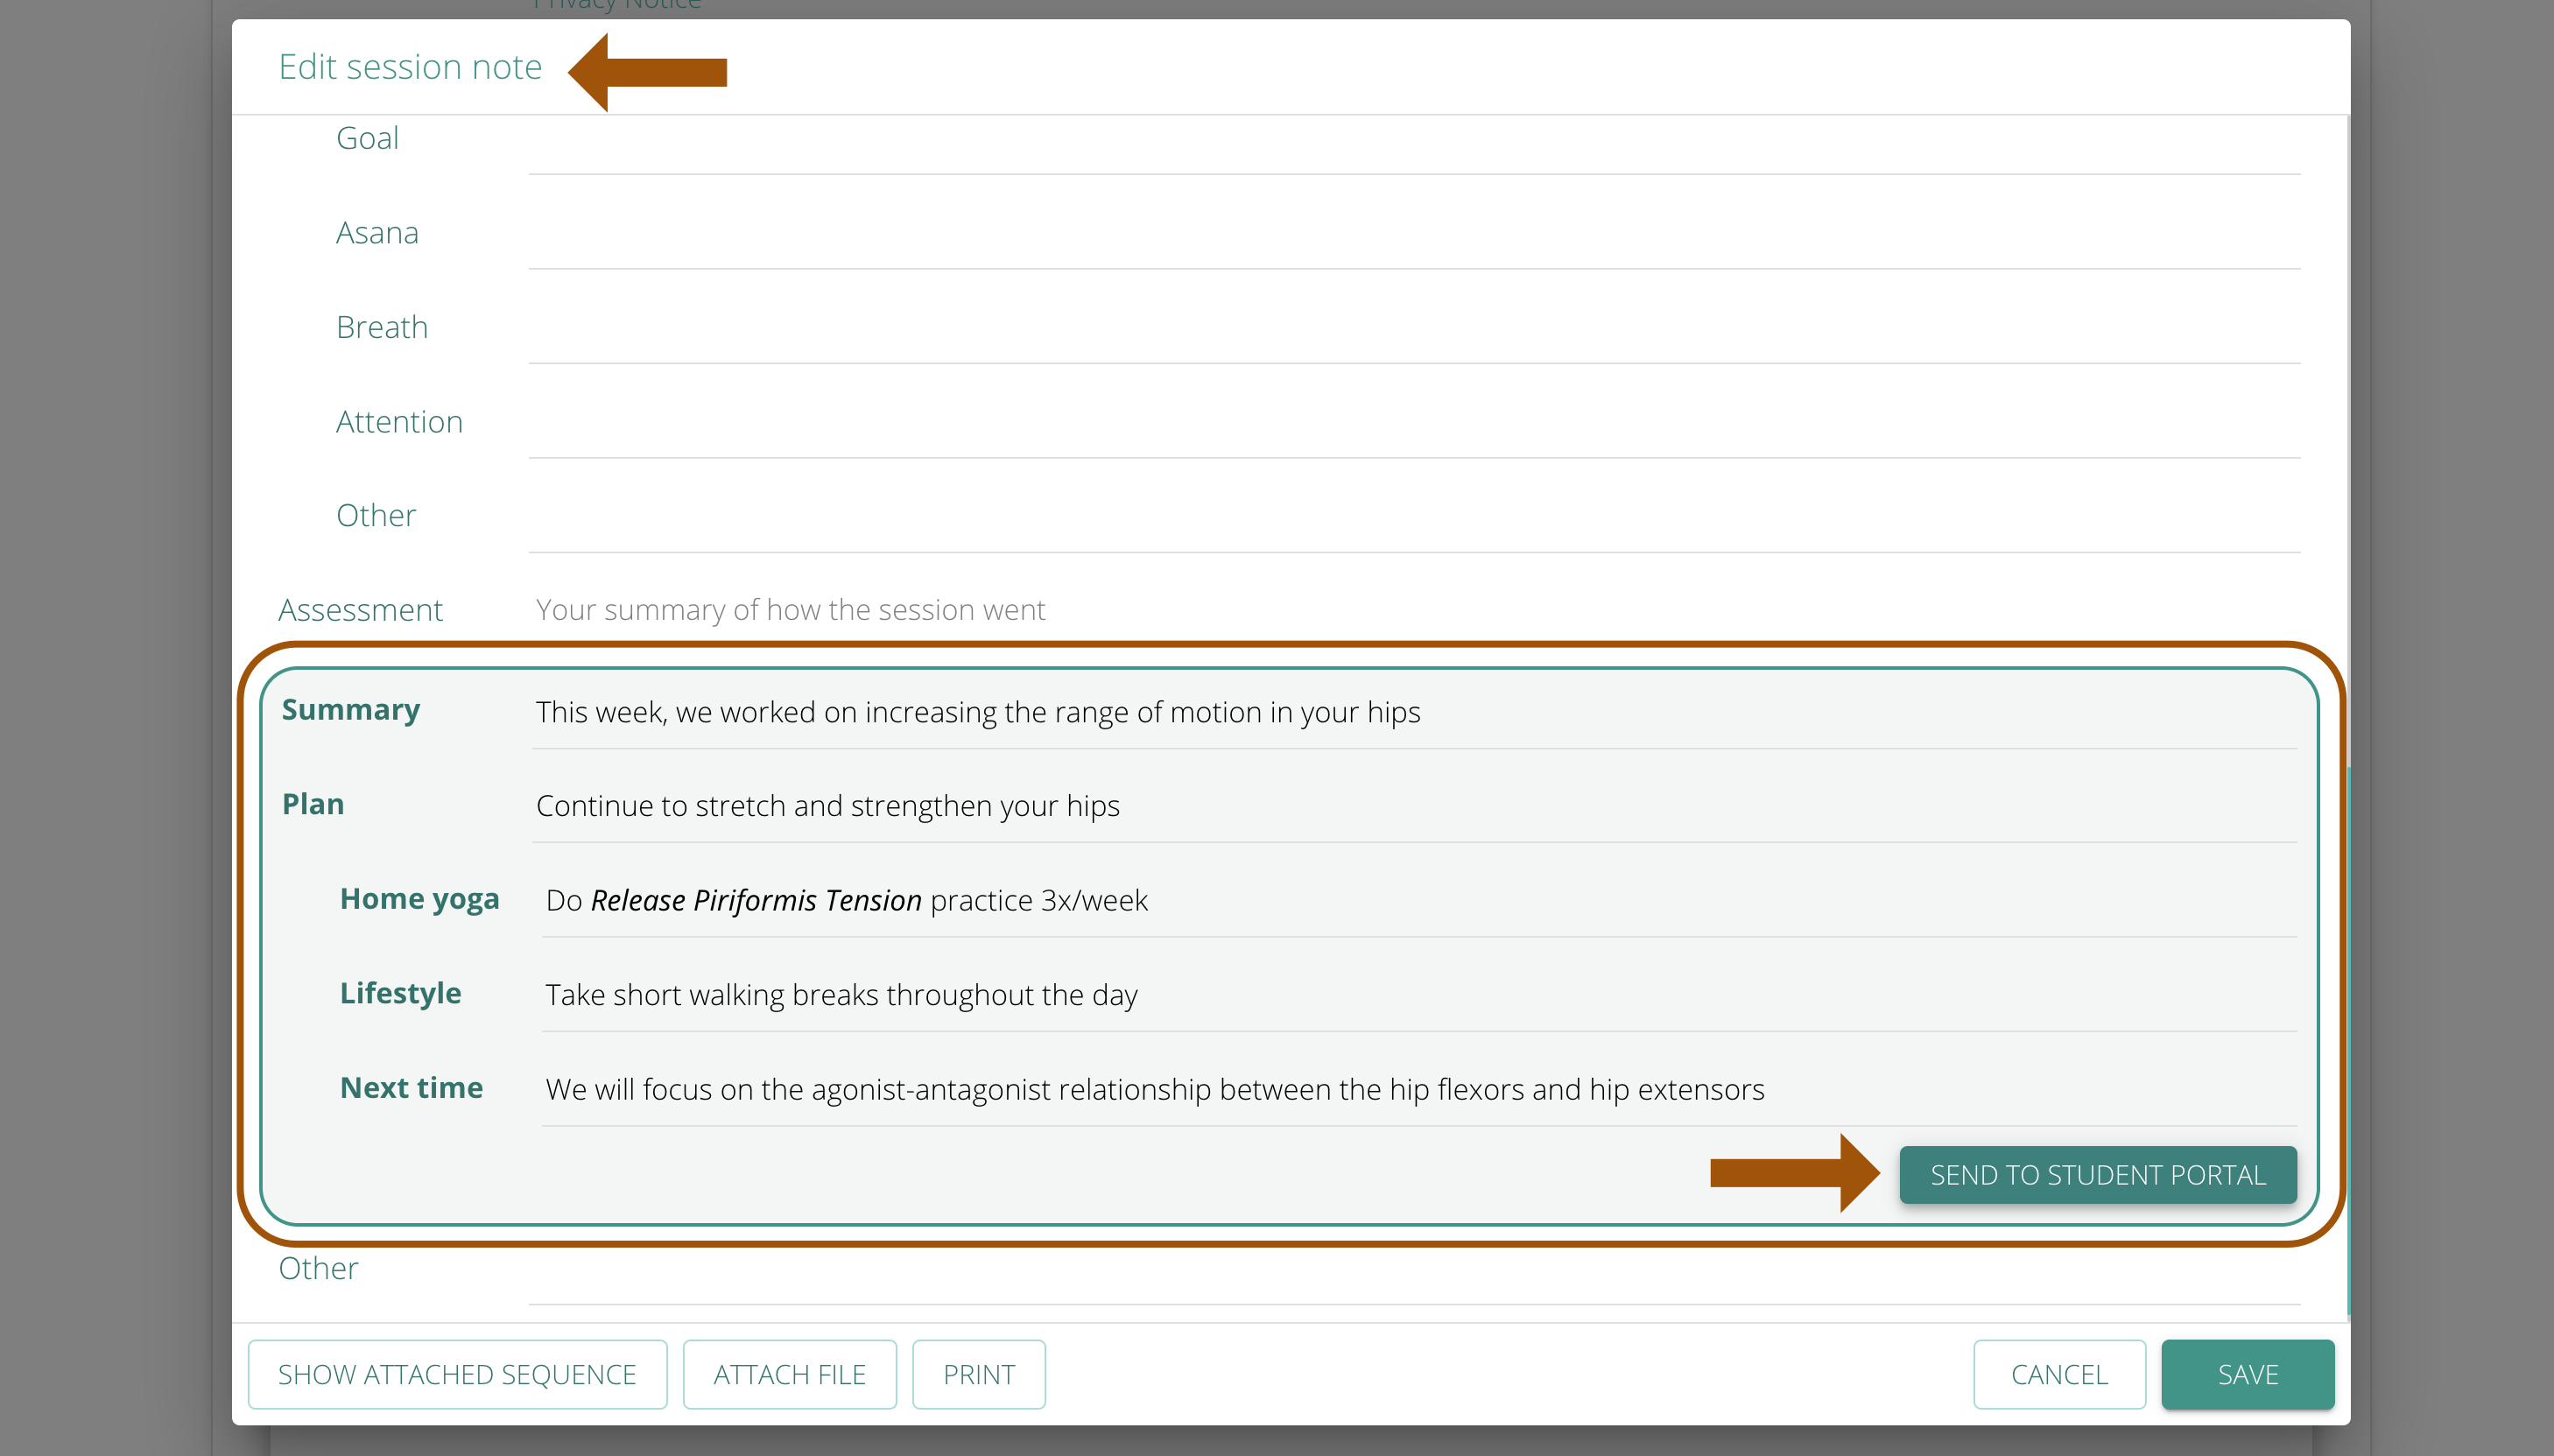
The Progress Report is made from a highlighted section in the Session Notes. You can enter the information you would like your students to receive and then click on SEND TO PORTAL button.
We now offer teacher-student real-time messaging. You will have a continuous chat with each of your student that will contain the history of all your interactions, including the text you enter when you send them files using SEND EMAIL button.
The student can send messages from their Portal using the messaging icon. The student will see a red-dot badge on the messages icon when they get a new message.
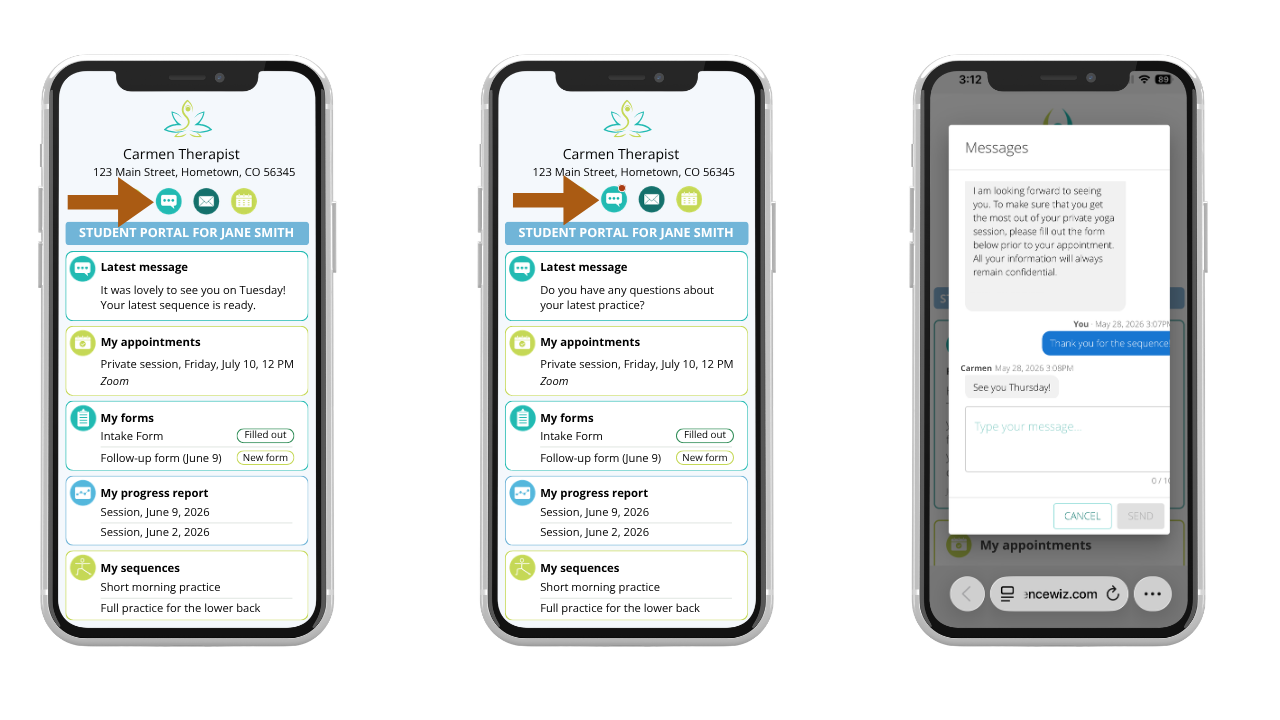
When a message is sent, it is displayed semi-transparent. After successful delivery, it becomes fully visible. Successful delivery means the message has reached the recipient.
The teacher can send messages by clicking on MESSAGES button in Student Profile.
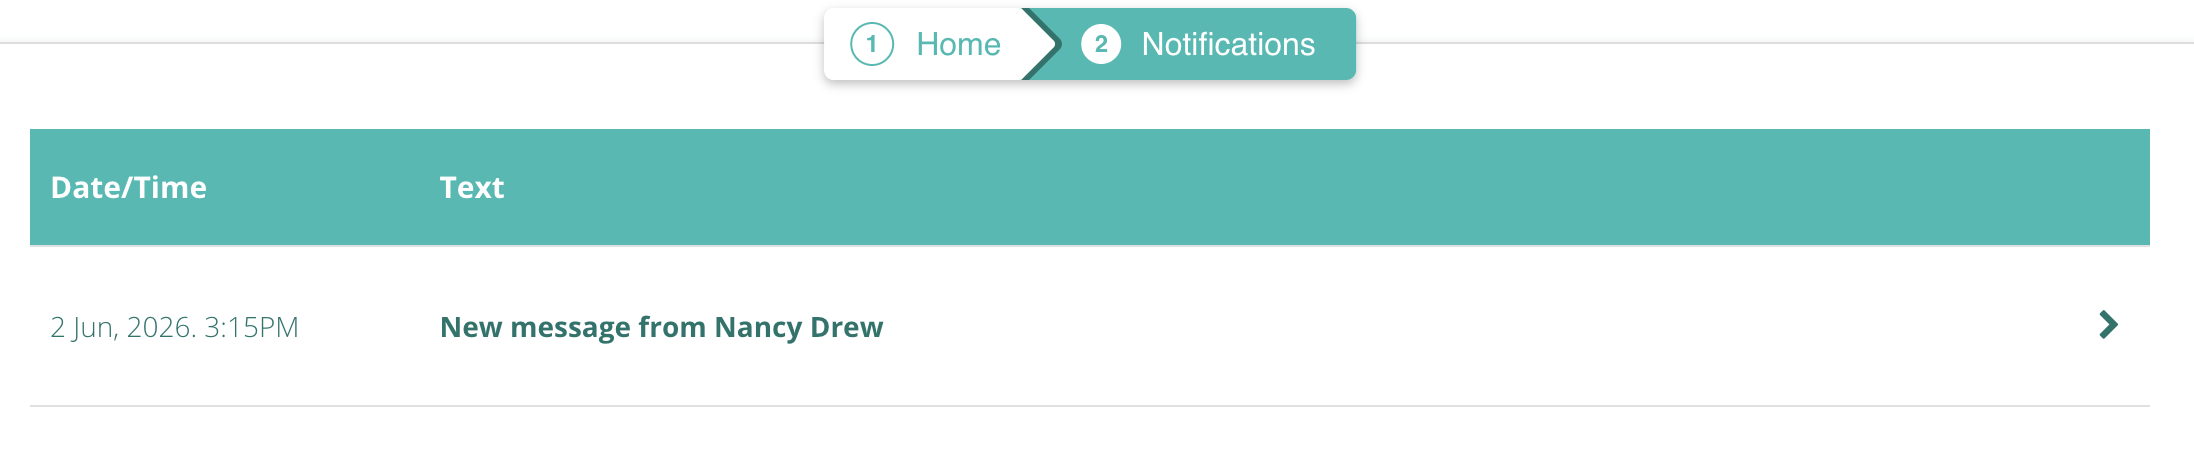
The teacher will get a notification about a new message in the upper-left corner (bell icon).
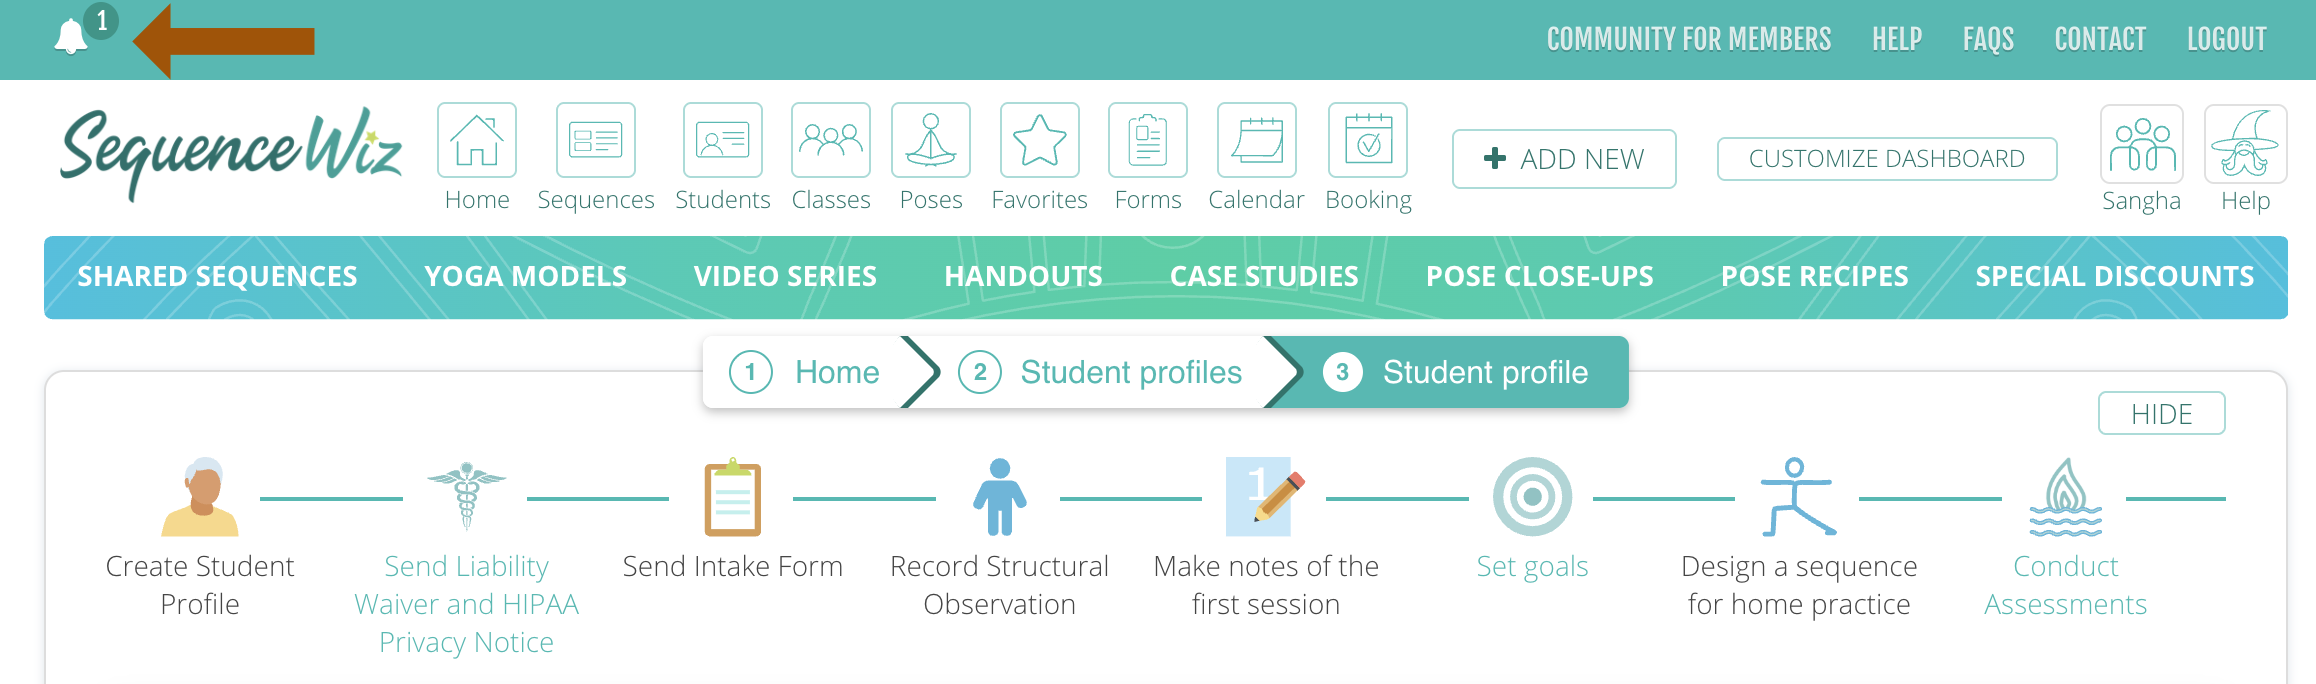
Clicking on the notification bell will take you to the Notifications List where you can view it and reply to the message.